

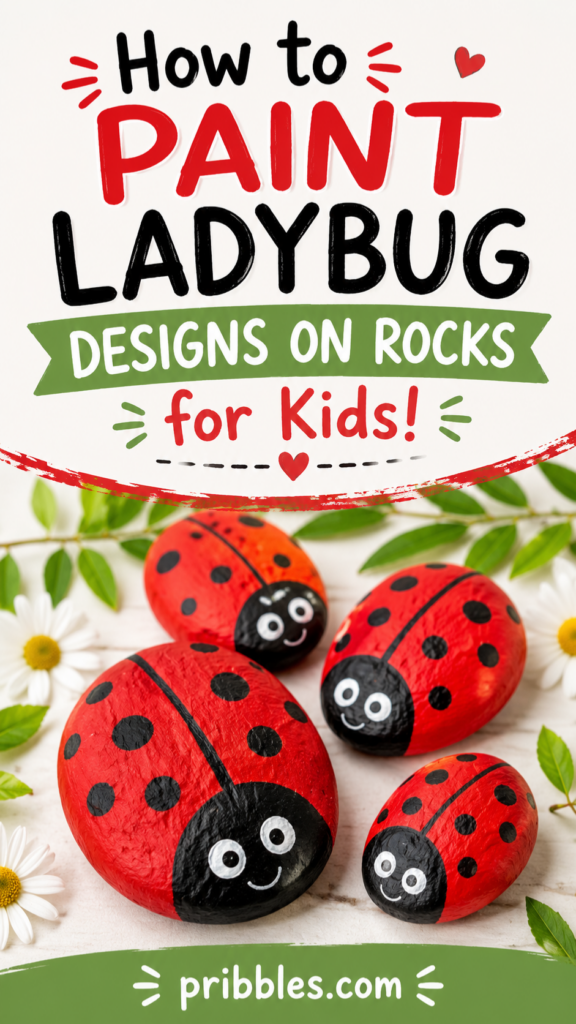
How to Paint Ladybug Designs on Rocks for Kids
Painting ladybugs on rocks is one of those sweet, simple crafts that kids can enjoy without needing a ton of supplies or fancy art skills. It’s colorful, hands-on, and just messy enough to feel fun without turning your whole kitchen table into a disaster zone.
Ladybug rocks are perfect for spring crafts, summer boredom busters, garden decorations, classroom art projects, nature units, or even a cute handmade gift for grandparents. Kids can make them bright red and classic, or they can get creative with pink, yellow, purple, blue, or rainbow ladybugs.
The best part is that each ladybug rock will look a little different, and that’s part of the charm. Some will have big eyes, some will have tiny dots, some will look silly, and some will look surprisingly polished. There’s really no wrong way to make them.
Below, I’ll walk you through the supplies you need and the step-by-step instructions for painting ladybug rocks with kids.
Affiliate links may be used in this post and if so I will receive a commission at no extra cost. I’m also part of the Amazon Affiliate (Associate) program where I earn a commission from sales made through my affiliate links. Read the full disclosure policy.
Supplies You’ll Need
Here’s what you’ll want to gather before you start:
- Smooth rocks
- Acrylic paint
- Paintbrushes
- Black paint pen or black acrylic paint
- White paint pen or white acrylic paint
- Pencil
- Paper plate or paint palette
- Cup of water
- Paper towels
- Clear sealer, optional
- Newspaper, cardboard, or a craft mat to protect your table
For the classic ladybug look, you’ll want red, black, and white paint. But you can also let kids choose their own colors. A purple ladybug with pink dots? Absolutely. A yellow ladybug with black spots? Cute. A rainbow ladybug? Even better.
Step by Step Instructions
Step 1: Choose the Right Rocks
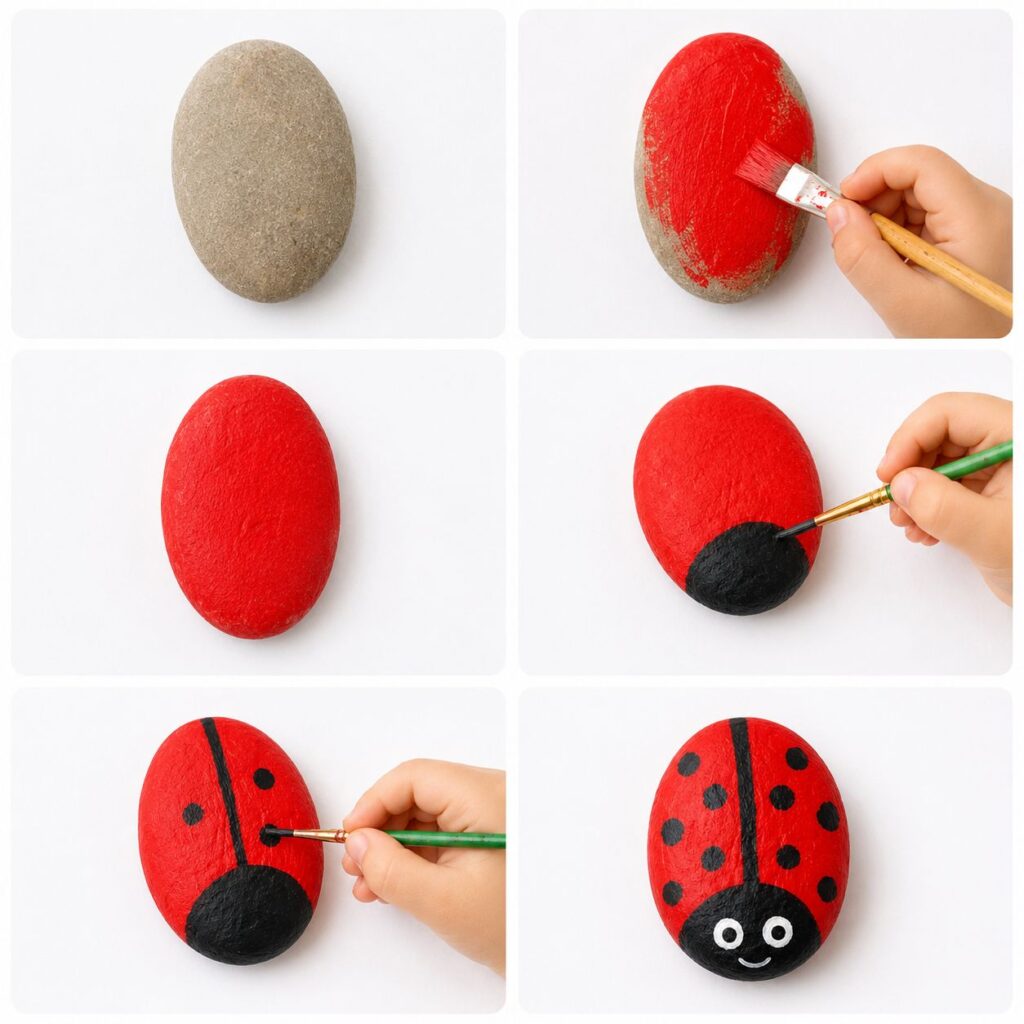
Start by choosing smooth, rounded rocks that are easy for little hands to paint. Flat oval rocks work especially well because they naturally look like a ladybug body.
You can find rocks outside, but make sure they are safe to collect and not from someone’s landscaping or a protected area. You can also buy smooth river rocks from craft stores, garden centers, or online.
For younger kids, larger rocks are usually easier to paint because they give them more space to work. Tiny rocks can be adorable, but they may be frustrating for little hands.
Once you have your rocks, give each child one or two to start with. This keeps the project from feeling overwhelming and gives them time to focus on each little ladybug.
Step 2: Wash and Dry the Rocks
Before painting, wash the rocks with warm water and a little dish soap. This helps remove dirt, dust, or grit that could make the paint bumpy.
After washing, dry the rocks completely with a towel and then let them air-dry for a bit. Paint sticks much better to a clean, dry surface.
This is also a nice step to let kids help with. They can scrub the rocks, rinse them, and line them up on a towel. It makes the whole craft feel like a little process, which kids usually love.
Step 3: Paint the Base Color
Once the rocks are clean and dry, it’s time to paint the ladybug body.
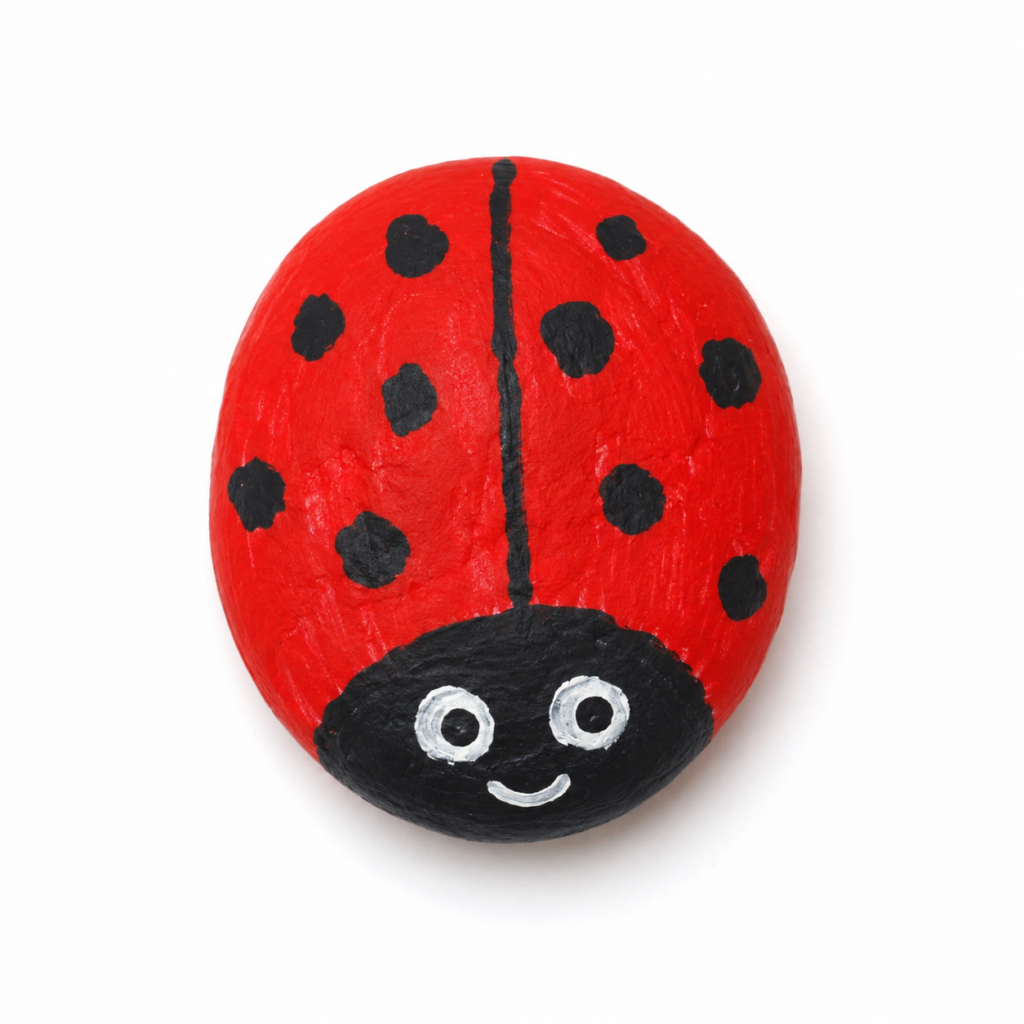
Have kids paint the top of the rock red for a classic ladybug design. They don’t need to paint the bottom unless they want to. A nice even coat on the top and sides is enough.
If the paint looks streaky after the first coat, let it dry and add a second coat. Acrylic paint usually dries pretty quickly, but thicker paint may need a little extra time.
This is a great place to add a photo later showing the rock painted fully red.
You can also encourage kids to try different ladybug colors. Pink ladybugs, orange ladybugs, and blue ladybugs are all adorable. This makes the craft feel more creative and less like everyone has to make the exact same thing.
Step 4: Let the Paint Dry
Before adding the ladybug details, let the base coat dry completely.
This step matters because if the paint is still wet, the black details can smear into the red paint. Kids may be eager to keep going, so this is a good time for a snack break, story time, or setting up the next supplies.
If you’re doing this craft with a group of kids, you may want to paint the base coat ahead of time or use a hair dryer on a low setting with adult help.
Step 5: Draw the Ladybug Head
Once the base color is dry, it’s time to add the ladybug’s head.
Use black paint to create a rounded half-circle shape at one end of the rock. This will be the head of the ladybug. If kids are using a paintbrush, show them how to slowly paint the shape instead of rushing.
For younger kids, you may want to lightly draw the head shape with a pencil first. Then they can fill it in with black paint.
A black paint pen can also make this step much easier, especially for kids who are still learning brush control.
Step 6: Add the Wing Line
Next, paint a black line down the center of the ladybug’s body. This line separates the two wings.
Start at the bottom of the black head and draw the line toward the back of the rock. It doesn’t have to be perfectly straight. A slightly wobbly line still looks cute and handmade.
For a simple version, just draw one straight line. For a more detailed version, you can make the line slightly curved or add a tiny triangle shape near the head where the wings meet.
This is another perfect step-by-step photo opportunity because it clearly shows the ladybug starting to come together.
Step 7: Paint the Black Spots
Now comes the fun part: ladybug spots.
Use black paint or a black paint pen to add dots on both sides of the wing line. Kids can make the dots large or small. They can add just a few spots or cover the wings with lots of them.
For younger kids, a cotton swab works really well for making dots. They can dip the end into black paint and gently press it onto the rock.
You can also use the back end of a paintbrush to make nice round dots. This is a simple little trick that makes the spots look neat without much effort.
Remind kids that the dots do not have to match perfectly on both sides. Real art does not need to be perfect, and ladybug rocks look extra charming when they have personality.
Step 8: Add Eyes
Once the black head is dry, add two white dots for eyes.
You can use white acrylic paint, a white paint pen, or the end of a small paintbrush. After the white paint dries, add a tiny black dot inside each white dot to make the eyes look finished.
For a silly look, kids can make the eyes extra big. For a cute look, they can place the eyes close together. For a cartoon style, add little eyelashes or a tiny smile.
If you’re crafting with very young kids, you can also use googly eyes instead of painted eyes. Just glue them on after the paint dries.
Step 9: Add a Smile or Extra Details
This step is optional, but kids usually love it.
Add a small smile to the ladybug’s face using a black paint pen or a tiny brush. You can also add cheeks with pink paint, tiny eyelashes, or little antennae.
To make antennae, draw two small curved lines coming from the top of the head. Add a little dot at the end of each line if you want.
Kids can also add extra designs to the body, like hearts, stars, flowers, or glitter paint. This is where the craft can become more playful and personal.
Step 10: Let Everything Dry Completely
After all the details are painted, let the rocks dry completely.
It’s best to leave them alone for at least a few hours. If the paint feels tacky, give it more time. Acrylic paint may feel dry on top before it is fully set, especially if kids used thick layers.
If you’re making these for a classroom or party craft, place each child’s rock on a labeled paper plate while it dries. That way everyone knows which ladybug belongs to them.
Step 11: Seal the Painted Rocks
If you want the ladybug rocks to last longer, especially outdoors, add a clear sealer.
Use an outdoor-safe clear spray sealer or a brush-on sealer. This step should always be done by an adult and in a well-ventilated area.
Sealing the rocks helps protect the paint from scratches, rain, and fading. If the rocks will stay inside as decorations, sealing is optional but still helpful.
Let the sealer dry fully before handling the rocks or placing them outside.
Fun Ways to Use Ladybug Rocks
Once the ladybug rocks are finished, there are so many cute ways to use them.
Kids can place them in the garden, line them along a flower bed, or tuck them into potted plants. They can also use them as paperweights, shelf decorations, or handmade gifts.
Ladybug rocks are also fun for imaginative play. Kids can make a whole family of ladybugs in different sizes and colors. They can create a little bug village, add them to a fairy garden, or hide them around the yard for a scavenger hunt.
If you’re doing this craft with a group, each child can paint one ladybug and then display them together as a colorful little rock garden.
Tips for Painting Rocks with Kids
Keep the setup simple. Too many paint colors and supplies can feel overwhelming, especially for younger kids.
Use washable table coverings, old shirts, or craft aprons because acrylic paint can stain clothing.
Pour small amounts of paint at a time. Kids often use more paint than they need, and smaller amounts help cut down on waste and mess.
Let kids be creative. Their ladybugs do not need to look like the sample. The goal is to enjoy the process, not create a perfect little rock.
For younger kids, prep the rocks ahead of time by washing and drying them. You can even paint the base color first and let them add the spots, eyes, and details.
For older kids, let them sketch their design in pencil before painting. They may enjoy making patterns, color themes, or different expressions.
Ladybug Rock Design Ideas
If kids want to go beyond the classic red ladybug, here are a few fun ideas:
Make a rainbow ladybug with colorful stripes on the wings.
Paint a pink ladybug with heart-shaped spots.
Create a yellow ladybug with orange dots.
Make a family of ladybugs with one large parent ladybug and several tiny baby ladybugs.
Paint a sleepy ladybug with closed eyes.
Add flowers around the ladybug for a garden-themed rock.
Make a glitter ladybug by brushing glitter paint over the wings.
Create a name rock by writing the child’s name on the bottom.
These little variations are especially fun if you’re making several rocks at once.
Final Thoughts
Painting ladybug designs on rocks is such a sweet and easy craft for kids. It uses simple supplies, gives kids plenty of room to be creative, and creates something they can actually display or give as a gift.
Whether you make classic red ladybugs or a whole rainbow collection, this is a fun project for spring, summer, garden themes, bug units, or just a quiet afternoon at home.
Once the rocks are dry and sealed, kids can place their ladybugs outside and feel proud every time they spot them in the garden. It’s a simple craft, but it has that cozy handmade magic kids remember.