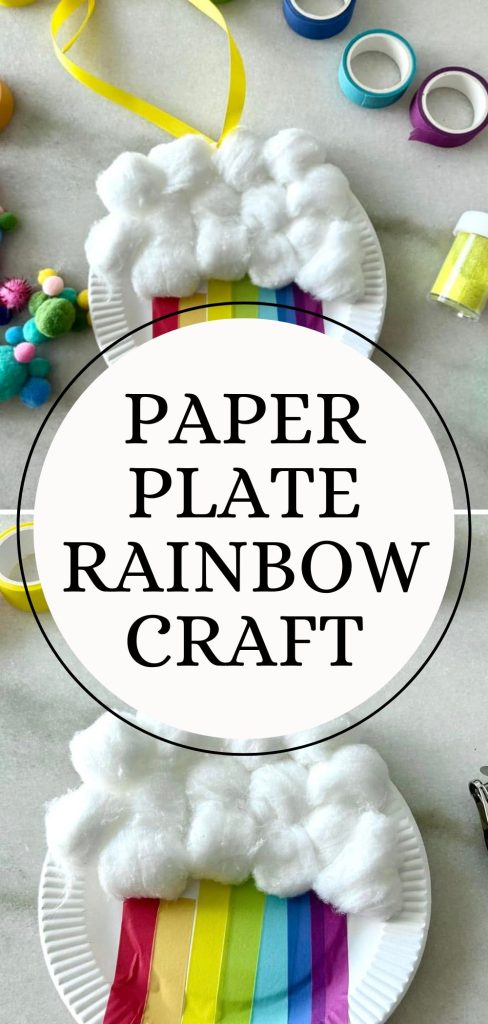
Paper Plate Rainbow Craft: No Fuss. Minimal Mess. Optimal Fun.
Are you looking for a fun, easy, and very low-mess craft to keep your toddler or preschooler busy and smiling?
Affiliate links may be used in this post and if so I will receive a commission at no extra cost. I’m also part of the Amazon Affiliate (Associate) program where I earn a commission from sales made through my affiliate links. Read the full disclosure policy.
This paper plate rainbow craft is the perfect hands-on activity that’s as colorful as it is simple to make.
With just a few basic supplies—most of which you probably already have at home—your little one can create their own cheerful rainbow masterpiece.
It’s a great way to sneak in some color recognition, fine motor skill practice, and creative play, all without turning your kitchen table into a disaster zone.
Let’s jump into this adorable craft that’s perfect for rainy days, quiet afternoons, or any time your kiddo needs a little extra color in their day!
More to Read:
- Spring Crafts for Preschoolers: Creative Spring Crafts Your Preschooler Will Love
- 23 Fun Summer Crafts for Kids (Easy & Cool)
- 15 Mother’s Day Crafts for Kids And Free Printables

Paper Plate Rainbow Craft
Before we jump into the step-by-step, let me just say—this craft is wonderfully simple and only takes a few supplies. No paint all over the table and no big clean-up afterward (can I get an amen?). You probably already have most of these items on hand, which makes it even better for those last-minute “Mom, I’m bored!” moments.
Here’s what you’ll need:
- A paper plate
- Washi tape (the more colorful, the better!)
- Cotton balls
- Elmer’s glue
- A hole punch
- One piece of ribbon
That’s it! Now let’s get started on this cute and colorful paper plate rainbow craft your little one is going to love!
If you like this craft and want more, just sign up for the free weekly newsletter below! You’ll also get access to our free printable library!
Gather Supplies
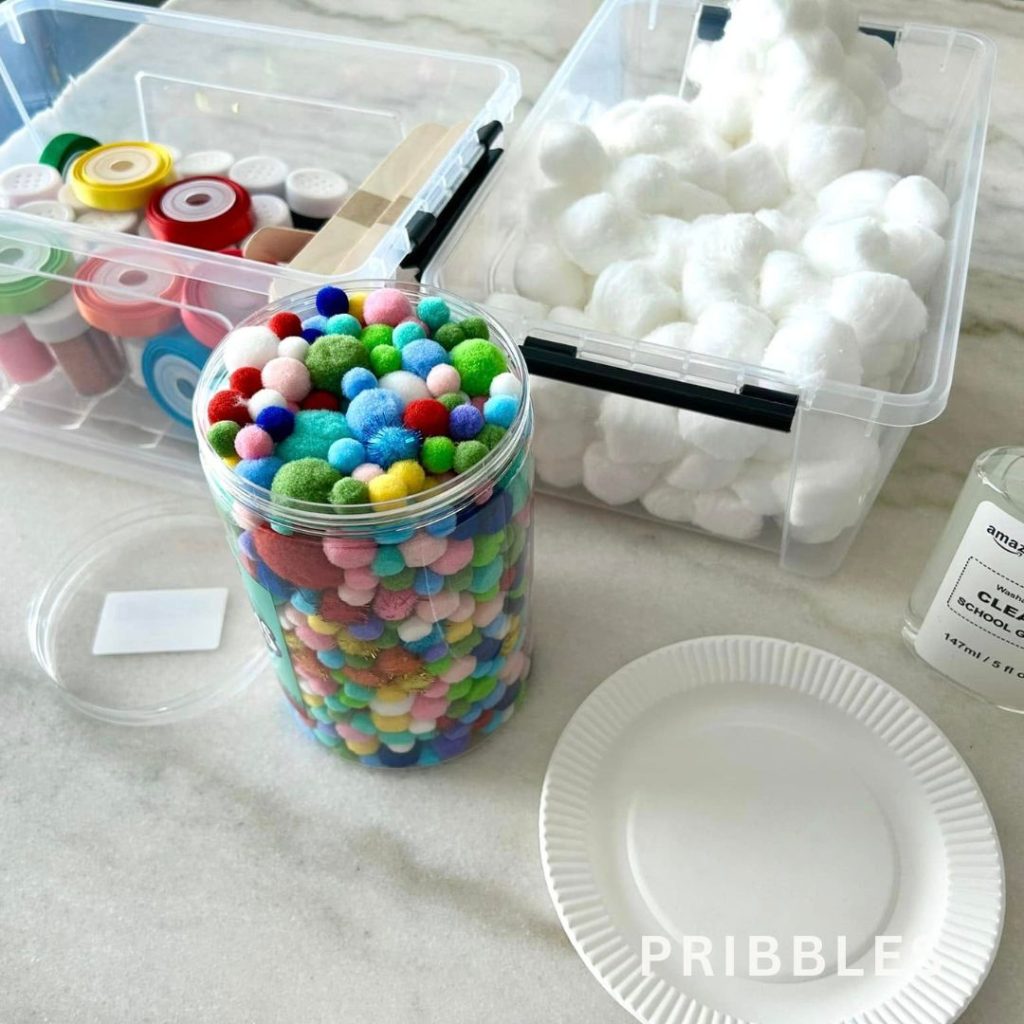
Supplies
- Elmer’s Glue
- Cotton Balls
- Paper Plate (any size, I used 6 inch)
- Colorful Washi Tape
- Hole Punch
- Ribbon
Optional Supplies
- Colorful pom poms
Step One: Gather Your Plate and Cotton Balls
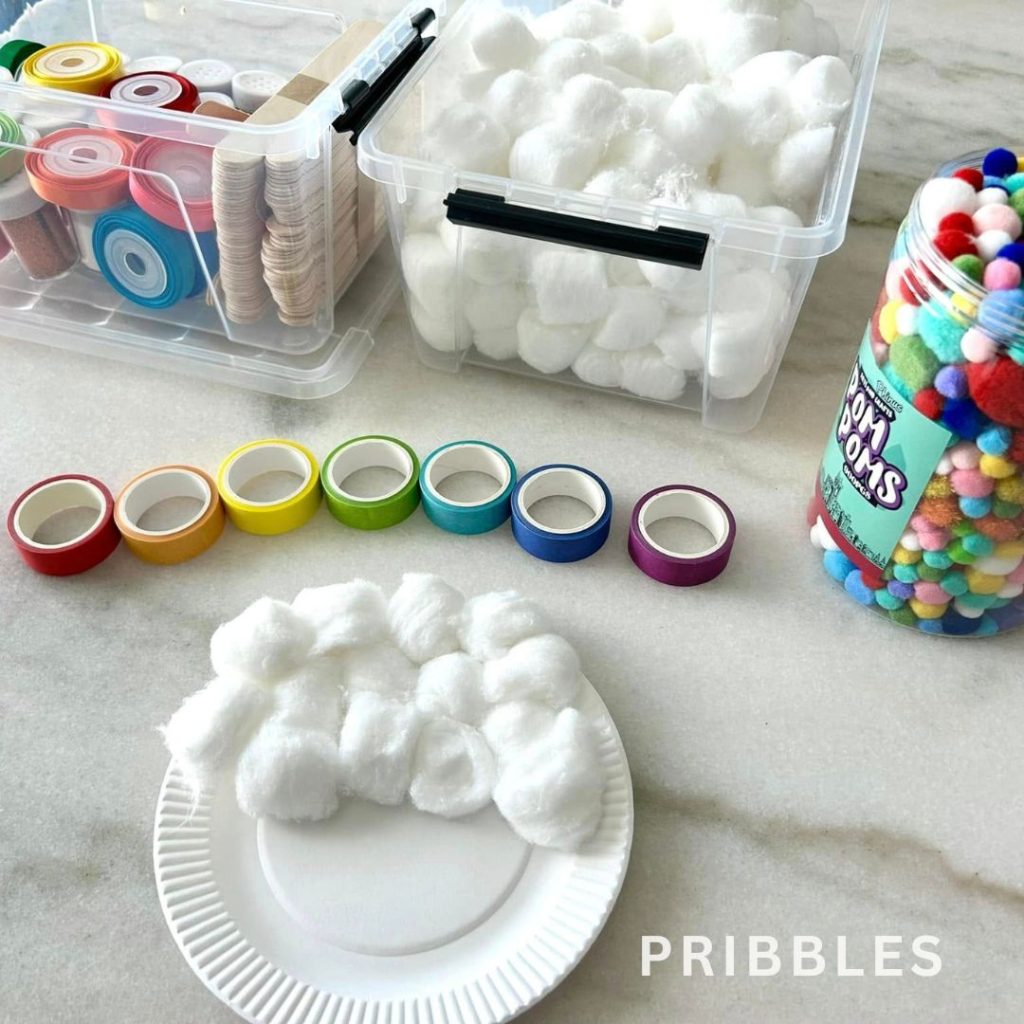
Grab a paper plate—any size will do—and set out your Elmer’s glue and some cotton balls (I used regular-sized ones, but any kind works).
Find a spot where your little one can get a bit messy with the glue without it being a big deal—think kitchen table or a crafting tray.
Once you’re set up, help your child dab a little glue on the back of each cotton ball and place the cotton balls on the top half of the paper plate.
Just a friendly reminder to keep an eye on them while they work—toddlers can be a little too curious sometimes, and we definitely don’t want anyone tasting the glue!
If you’d rather keep things extra tidy, you can handle the glue part yourself and let your child press the cotton balls onto the plate.
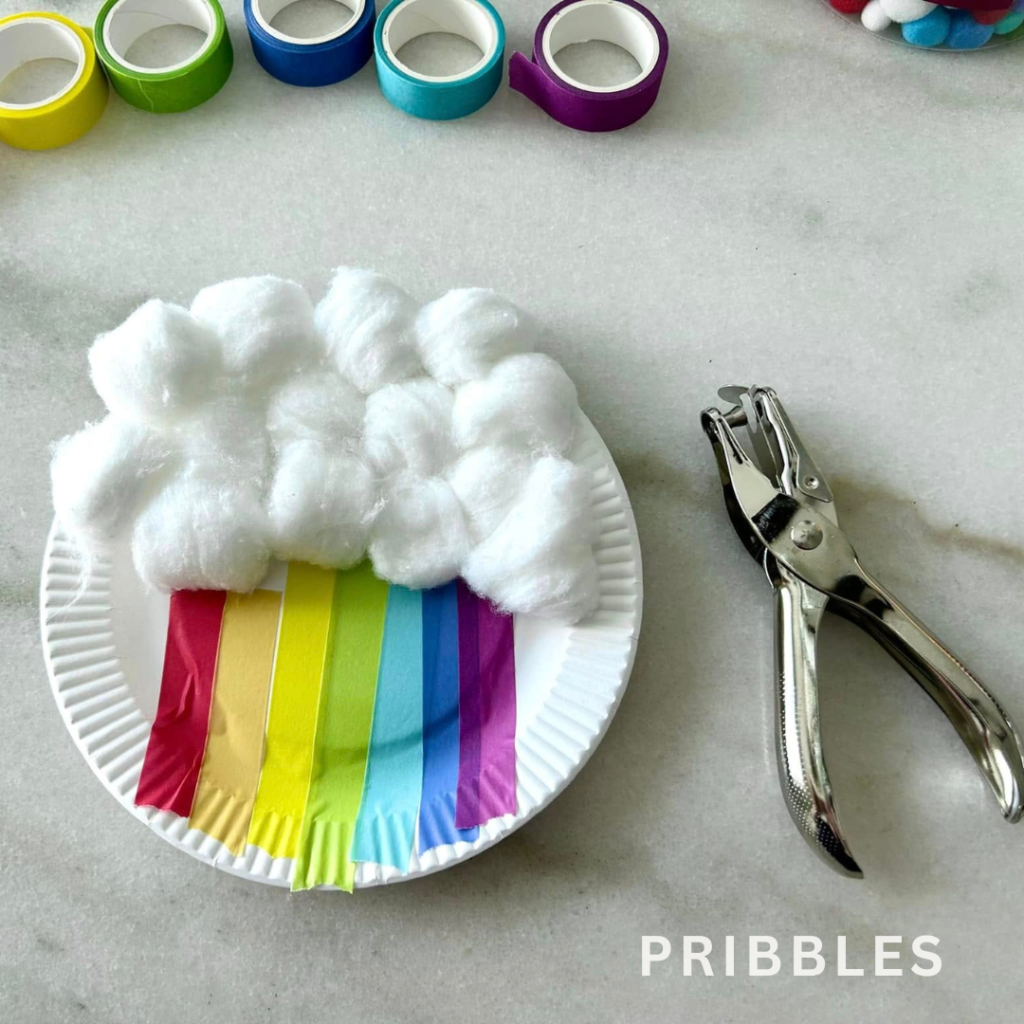
Step Two: Add the Rainbow Strips
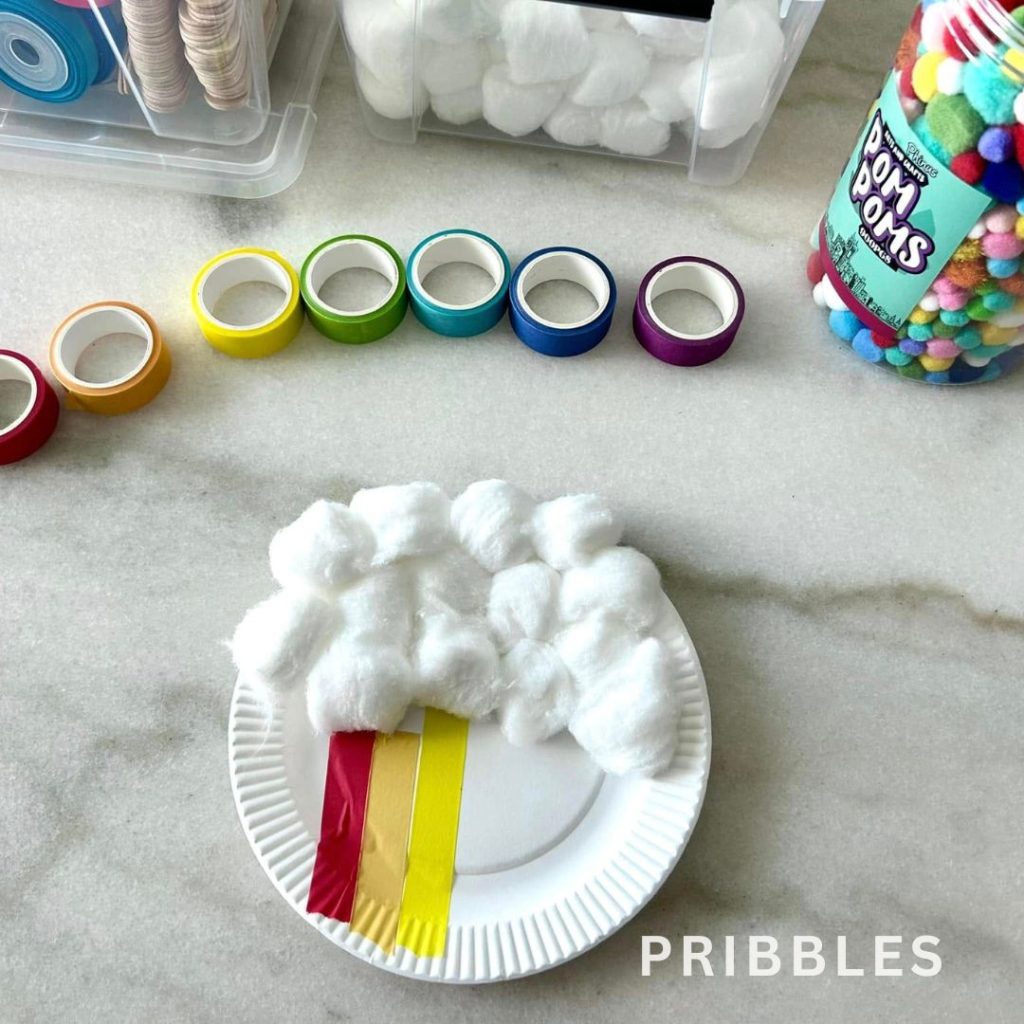
Next up, it’s time to add the washi tape strips to create the rainbow coming out from under the fluffy cotton clouds.
This is where the super easy—and totally mess-free—part of the craft shines.
Honestly, aside from a little glue at the beginning, this whole activity stays pretty clean.
You can stick with traditional rainbow colors or just go with whatever fun, colorful washi tape you have on hand—anything goes!
For younger kids, it helps to pre-cut the strips ahead of time so they can focus on the fun part: sticking them on.
You’ll want to place the strips vertically, starting just under the cotton balls, either in rainbow order or in any playful pattern your child loves. It’s all about creativity and color!
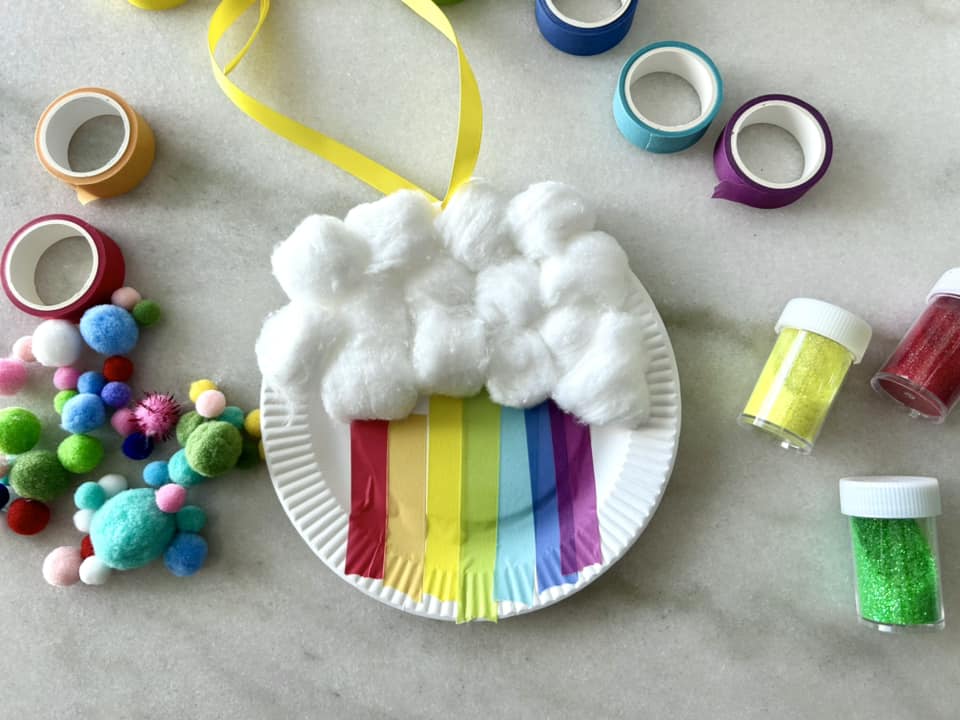
Step Three: Punch Hole & Add Ribbon
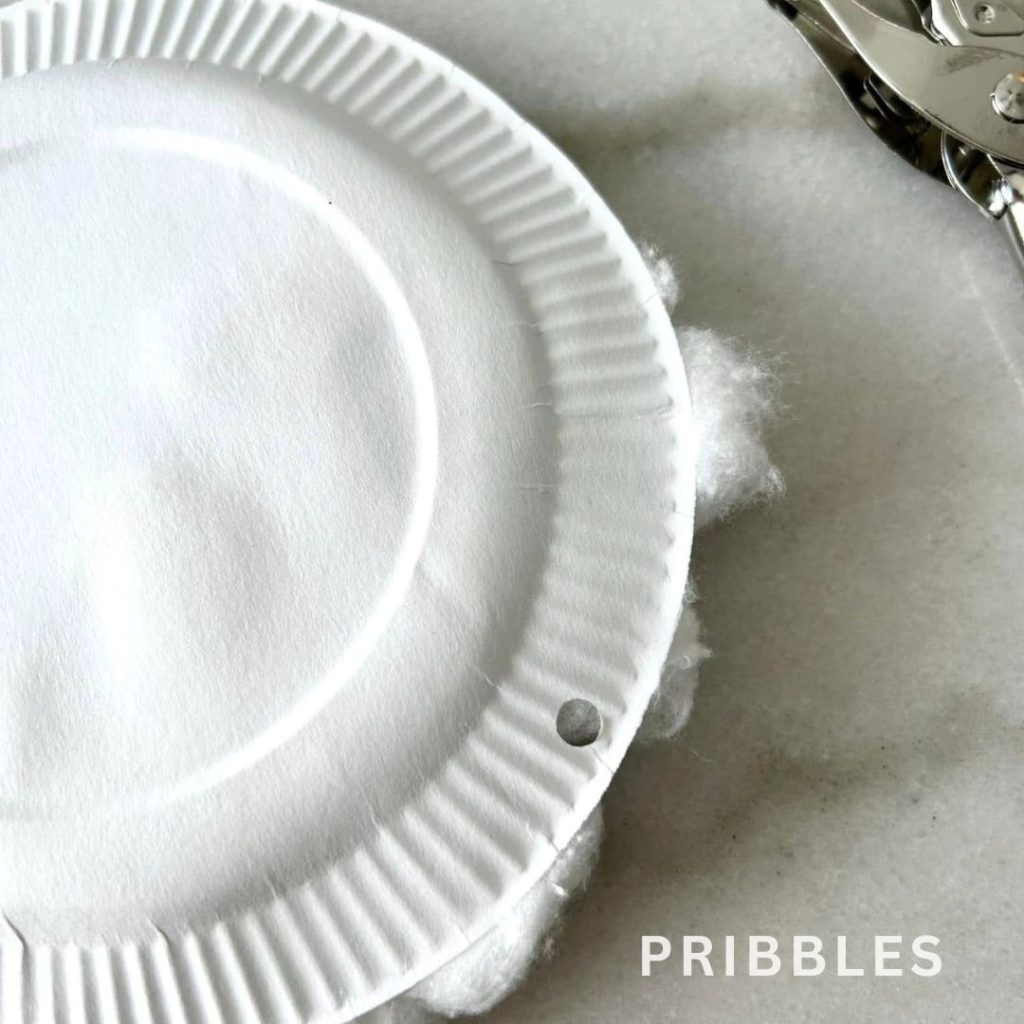
The final step in this sweet little craft is punching a hole and adding the ribbon. Yep, that’s it—told you it was simple and pretty!
At this point, you can absolutely call it done and admire the cuteness.
I used a 1/4-inch hole punch to make a hole at the top center of the paper plate, then threaded a piece of ribbon through and tied a knot at the end.
Now it’s ready to hang on the wall, tape to a window, or be proudly carried around by your little one like their very own rainbow masterpiece.
Step Four: Adding Poms Poms
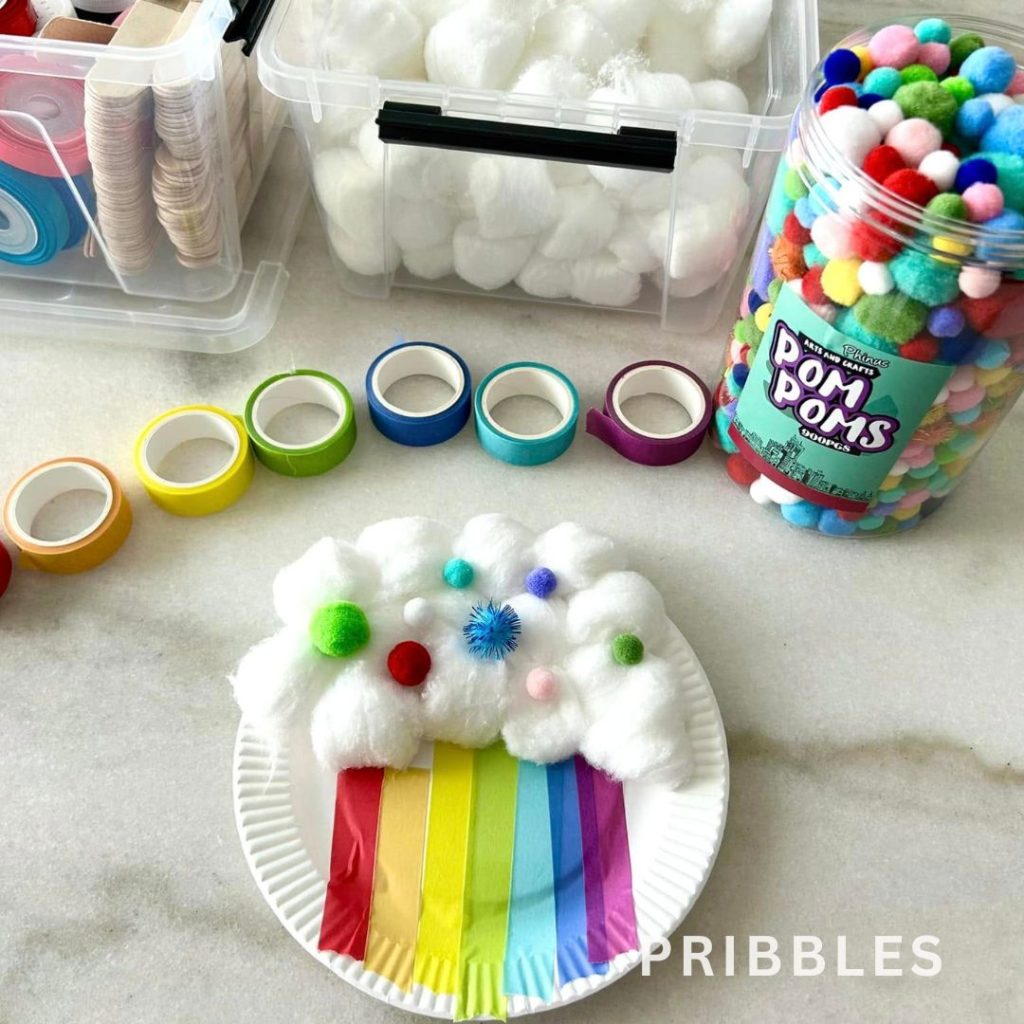
If you want to take this craft up a notch, the final optional step is adding some colorful little pom poms to the clouds for an extra pop of fun!
Just dab a bit of Elmer’s glue on the back of each pom pom and press them onto the cotton ball clouds.
Like with the cotton balls, you can handle the glue yourself and let your little one place the pom poms—or if you’re okay with a little extra mess, let them do the whole thing.
It’s a simple touch that adds even more color and personality to their rainbow creation!
Alternatives: Don’t Have Washi Tape?
No washi tape? No problem! There are plenty of alternatives you can use. Try cutting strips of construction paper or cardstock and gluing them down for a simple solution.
If you’ve got some white printer paper lying around, let your kids color in the rainbow stripes and glue them on.
And if you’re up for a little mess (and who isn’t?), you could even let your children paint the rainbow stripes directly onto the paper plate!
The best part? There’s no wrong way to do it—just let your imagination run wild and use whatever you have on hand!
Supply Links
If you’re looking for the supplies I used in this craft, I’ll have them linked below.
Please note that these are affiliate links, which means if you purchase through my link, I’ll earn a small commission—at no extra cost to you.
Of course, you’re more than welcome to buy supplies anywhere you like, but I tend to do most of my shopping on Amazon, so that’s where the links will take you. Thanks for supporting my site!
Final Thoughts
I hope you and your little one have just as much fun making this paper plate rainbow craft as we did! It’s such a simple, cheerful activity that’s perfect for a rainy afternoon, a quick weekend project, or anytime you want to add a little color to your day.
Crafts like these don’t have to be complicated to be special—sometimes all it takes is a few basic supplies, a little glue, and some imagination. Whether you follow the steps exactly or add your own creative twist, the most important part is spending time together and making sweet memories. Happy crafting!
Download the free PDF instructions!
Save for Later
Pin this article for later reading by hovering over the image below and clicking the Pinterest button!