47 Scrap Fabric Projects You’ll Wish You Tried Sooner
Last Updated on 07/05/2026 by Nell Marie
If you’re anything like me, you probably have a basket (or three!) overflowing with fabric scraps that are simply too pretty to throw away. Every little floral print, cozy flannel, and colorful cotton square feels like it has some kind of potential—you just need the right idea. That’s exactly what you’ll find here. Whether you’re looking for quick gifts, cozy home decor, fun sewing projects, or clever ways to use every last scrap, these fabric projects prove that even the tiniest leftovers can become something beautiful. Grab your favorite stash, thread your machine, and let’s turn those forgotten scraps into handmade treasures you’ll actually be excited to show off.
More sewing articles:
- Sew Cute! Adorable DIY Sewing Clothes You Can Totally Make at Home
- Sew Smarter, Not Harder: Game-Changing Sewing Hacks You’ll Love
- 18 Small Sewing Projects: Adorable Sewing Projects You’ll Actually Finish
- Easy Sewing Projects for Moms Who Want to Make Stuff and Still Eat Lunch
Affiliate links may be used in this post and if so I will receive a commission at no extra cost. I’m also part of the Amazon Affiliate (Associate) program where I earn a commission from sales made through my affiliate links. Read the full disclosure policy.
Get our free Two Week Family Dinner Meal Planner
When you join our newsletter

Note from Nell
If I had to pick my favorite way to use up fabric scraps, I’d probably choose patchwork projects every single time. There’s something so satisfying about taking a pile of leftover fabric that seems too small to use and turning it into something beautiful and useful. I especially love making patchwork tote bags, mug rugs, and throw pillow covers because every single one ends up completely unique. It also reminds me that creativity doesn’t have to be perfect—or expensive. Sometimes the prettiest projects are the ones made from little bits and pieces you almost threw away.
Nell Marie
47 Scrap Fabric Projects
Now comes the fun part! Whether you’re looking for a quick afternoon sewing project or hoping to make a serious dent in your overflowing scrap bin, there’s something here for every skill level. From practical everyday items to cozy home décor, thoughtful handmade gifts, and adorable accessories, these scrap fabric projects prove that even the smallest pieces of fabric can become something beautiful.
1. Patchwork Throw Pillow Covers
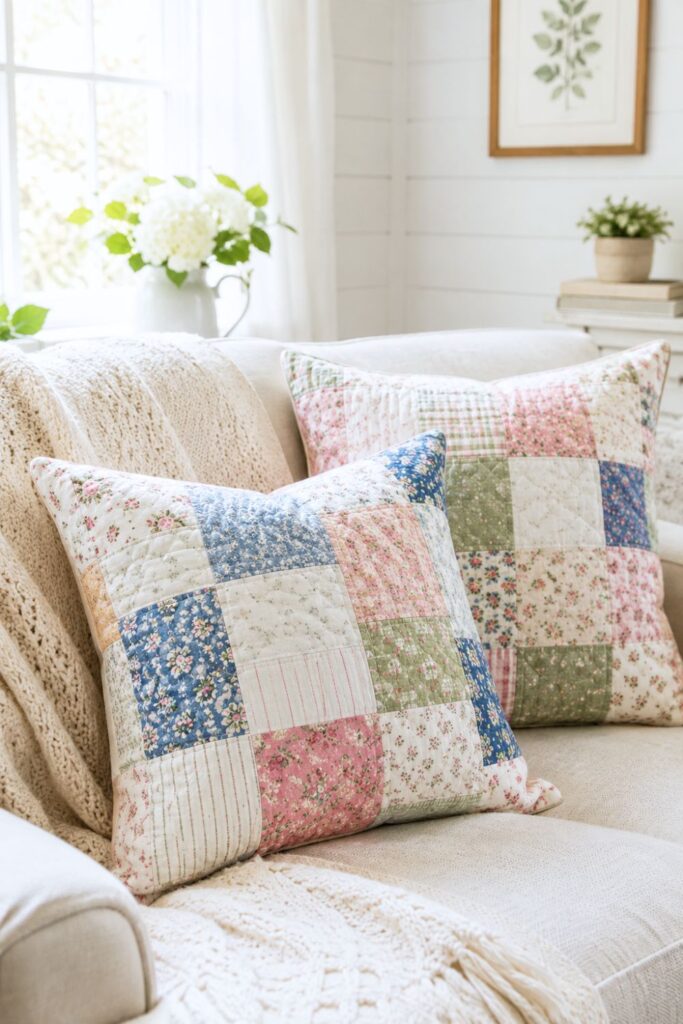
If you have a collection of fabric scraps that are too pretty to hide away, patchwork throw pillows are the perfect place to show them off. Mix florals, stripes, gingham, or solids to create one-of-a-kind pillows that instantly add personality to your living room, bedroom, or reading nook. They’re also a wonderful beginner quilting project.
Why you’ll love them:
- Great for larger scraps
- Completely customizable
- Adds cozy, handmade charm to your home
- Makes thoughtful housewarming gifts
How to Make a Patchwork Throw Pillow Cover
Making a patchwork throw pillow cover is easier than it looks! Here’s a simple overview of the process:
- Choose your fabrics. Gather coordinating fabric scraps in colors and patterns you love.
- Cut your pieces. Trim your scraps into squares or rectangles that are all the same size.
- Arrange your design. Lay the pieces out until you’re happy with the pattern and color placement.
- Sew the patchwork. Stitch the pieces together into rows, then sew the rows together to create one large patchwork panel.
- Press the seams. Iron the seams flat as you go for a neat, professional finish.
- Cut the backing fabric. Use a single piece of fabric or create an envelope-style backing with two overlapping pieces.
- Sew the pillow cover together. Place the front and back pieces right sides together and stitch around the edges, leaving an opening if needed.
- Turn and finish. Turn the cover right side out, press it, and insert your pillow form.
Tip: A 16×16-inch or 18×18-inch pillow cover is a great beginner size and doesn’t require a huge amount of fabric, making it perfect for using up scraps.
2. Fabric Bookmarks
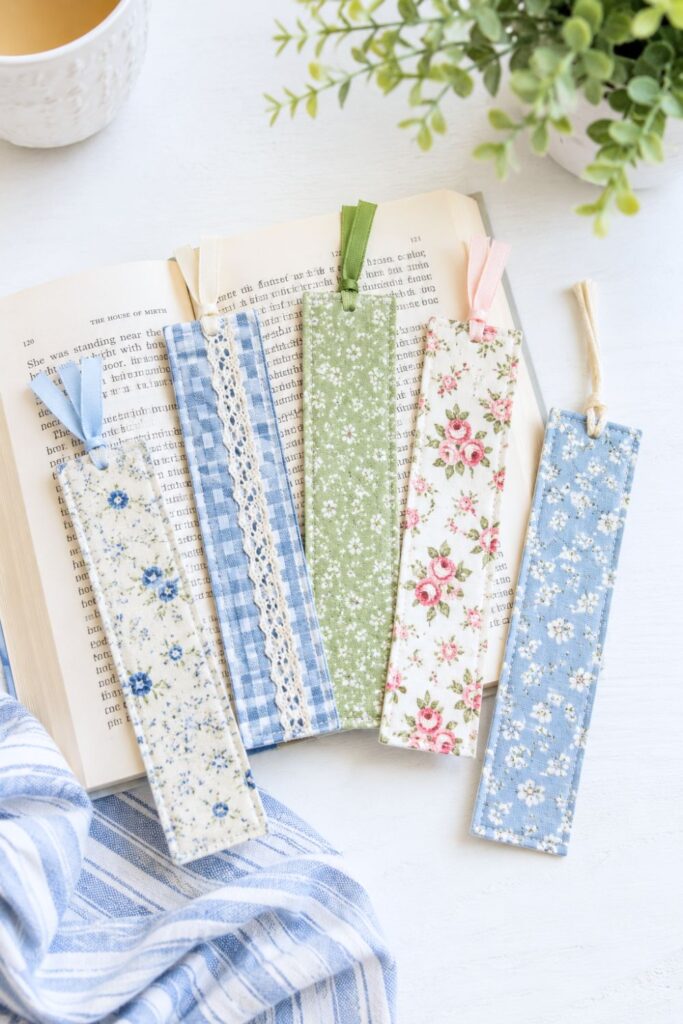
Fabric bookmarks are one of those quick little projects that are surprisingly addictive to make. They’re perfect for using tiny pieces of cotton or linen, and they make wonderful gifts for teachers, book lovers, or anyone who enjoys curling up with a good novel. Add a bit of interfacing to help them keep their shape or stitch on decorative embroidery for an extra-special touch.
How to Make Fabric Bookmarks
Fabric bookmarks are one of the quickest sewing projects you can make and are perfect for using even the smallest fabric scraps.
- Pick your fabric. Choose two coordinating cotton fabric scraps for the front and back of the bookmark.
- Cut the pieces. Cut matching rectangles in your desired bookmark size, typically around 2 x 6 inches.
- Add interfacing. Iron lightweight fusible interfacing onto one piece to help the bookmark keep its shape.
- Layer the fabric. Place the fabric pieces right sides together, or add ribbon or tassel material at the top before sewing if desired.
- Sew around the edges. Stitch around the bookmark, leaving a small opening for turning.
- Turn it right side out. Carefully turn the bookmark, push out the corners, and press it flat with an iron.
- Topstitch to finish. Sew a neat topstitch around the edge to close the opening and give the bookmark a polished look.
- Enjoy or gift it. Slip it into your favorite book or make several to give as thoughtful handmade gifts.
Tip: Dress up your bookmarks with lace trim, decorative stitching, embroidery, or colorful tassels to make each one completely unique.
3. Quilted Pot Holders
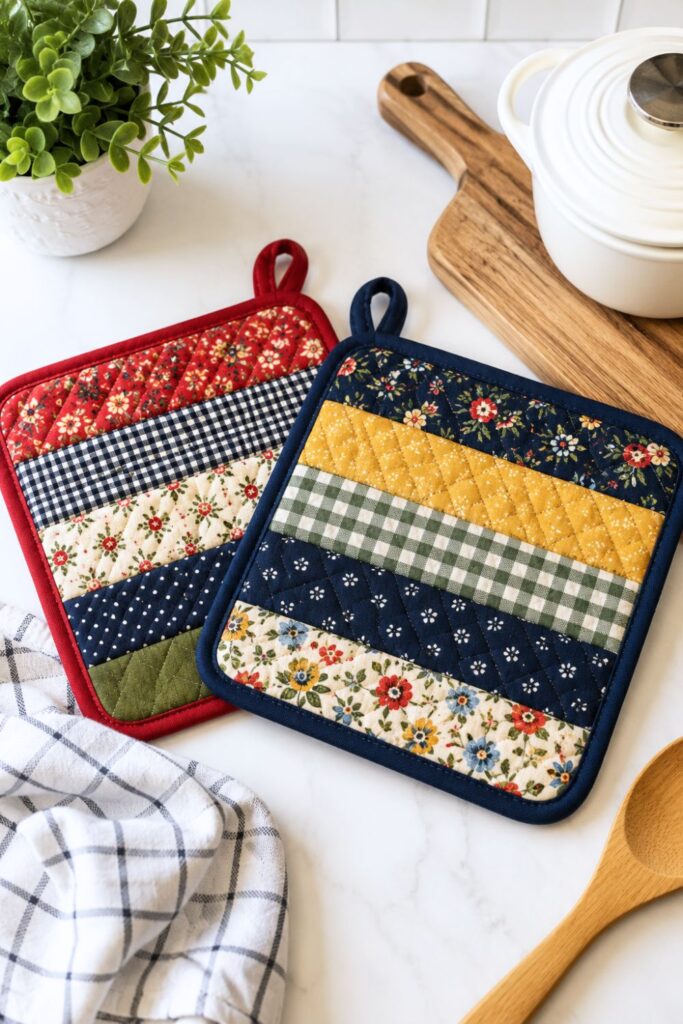
Quilted pot holders are practical, fun to sew, and an excellent way to use coordinating fabric scraps. Layer cotton batting between colorful fabrics, quilt simple straight lines, and bind the edges for a polished finish. Once you make one set, you’ll probably find yourself making extras for birthdays, holidays, and hostess gifts.
Ideas to personalize them:
- Seasonal prints
- Farmhouse-inspired neutrals
- Bright modern patterns
- Monograms or embroidered initials
How to Make Quilted Pot Holders
Quilted pot holders are a fun project that combines simple quilting with something you’ll use every day in the kitchen.
- Choose your fabrics. Pick several coordinating cotton fabric scraps for the front and back of your pot holder.
- Cut the layers. Cut your fabric pieces along with a layer of cotton batting and insulated batting if desired for extra heat protection.
- Create the patchwork. Sew your fabric scraps together to make the front panel, then press all the seams flat.
- Layer everything together. Stack the backing fabric, batting, and patchwork front, making sure the layers are aligned.
- Quilt the layers. Sew straight lines, diagonal lines, or another simple quilting pattern to hold everything together.
- Trim the edges. Square up the pot holder so all the edges are even.
- Add binding. Sew bias binding around the outside edge and include a small hanging loop if you’d like.
- Give it a final press. Your quilted pot holder is ready to use or gift!
Tip: Always use 100% cotton fabric, cotton batting, and insulated batting made for hot kitchen items. Avoid polyester fabrics or batting, as they can melt when exposed to high heat.
4. Reusable Bowl Cozies
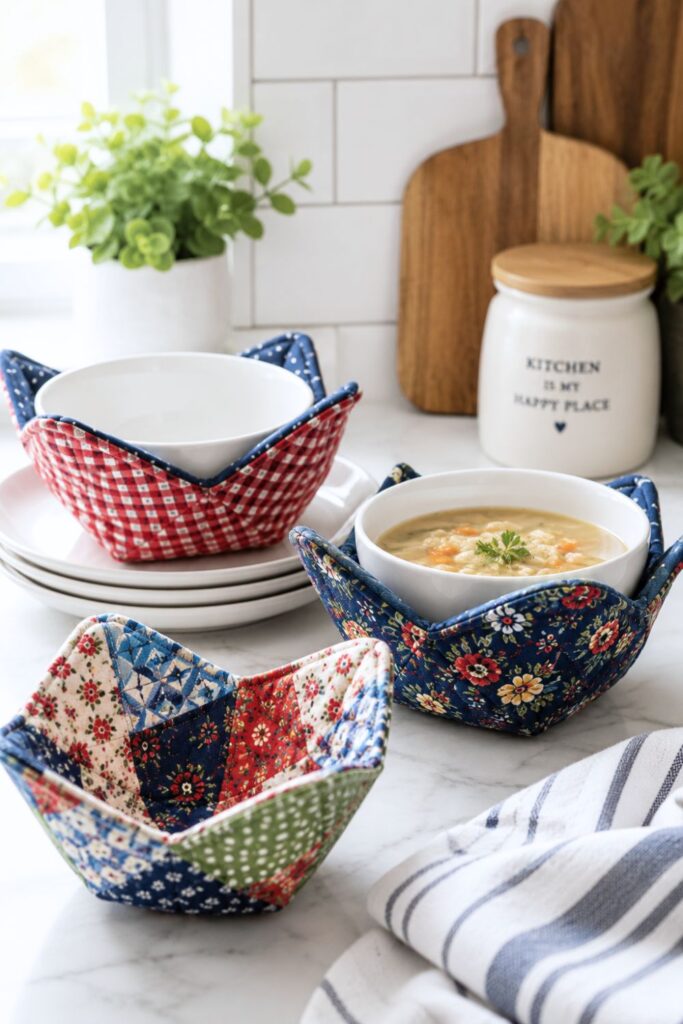
A bowl cozy makes heating soup, oatmeal, leftovers, or even ice cream much more comfortable by protecting your hands from hot or cold bowls. These practical little projects have become incredibly popular because they’re useful, washable, and surprisingly quick to sew.
They’re perfect for:
- Meal prep
- Homemade gift baskets
- College students
- Busy families
- Holiday gifts
How to Make Reusable Bowl Cozies
Reusable bowl cozies are a practical sewing project that’s perfect for soups, oatmeal, leftovers, and other hot meals. They’re surprisingly simple to make and come together in just a few steps.
- Choose your fabric. Select two coordinating 100% cotton fabrics for the inside and outside of the bowl cozy.
- Cut your materials. Cut matching fabric squares along with two pieces of cotton batting.
- Layer the fabric and batting. Place the batting behind each fabric square and quilt them together with simple straight lines.
- Mark and sew the darts. Fold the quilted squares and stitch the corner darts to create the bowl’s curved shape.
- Trim the seams. Clip and trim the dart seams to reduce bulk.
- Sew the two pieces together. Place the quilted pieces right sides together and stitch around the edges, leaving a small opening.
- Turn and topstitch. Turn the bowl cozy right side out, press it flat, and topstitch around the edge to close the opening.
- Fit it around your bowl. Slip the cozy around a microwave-safe bowl, and it’s ready to use.
Tip: Always use 100% cotton fabric, cotton thread, and cotton batting if you plan to microwave your bowl cozy. Synthetic materials can melt or become unsafe when heated.
5. Lavender Sachets
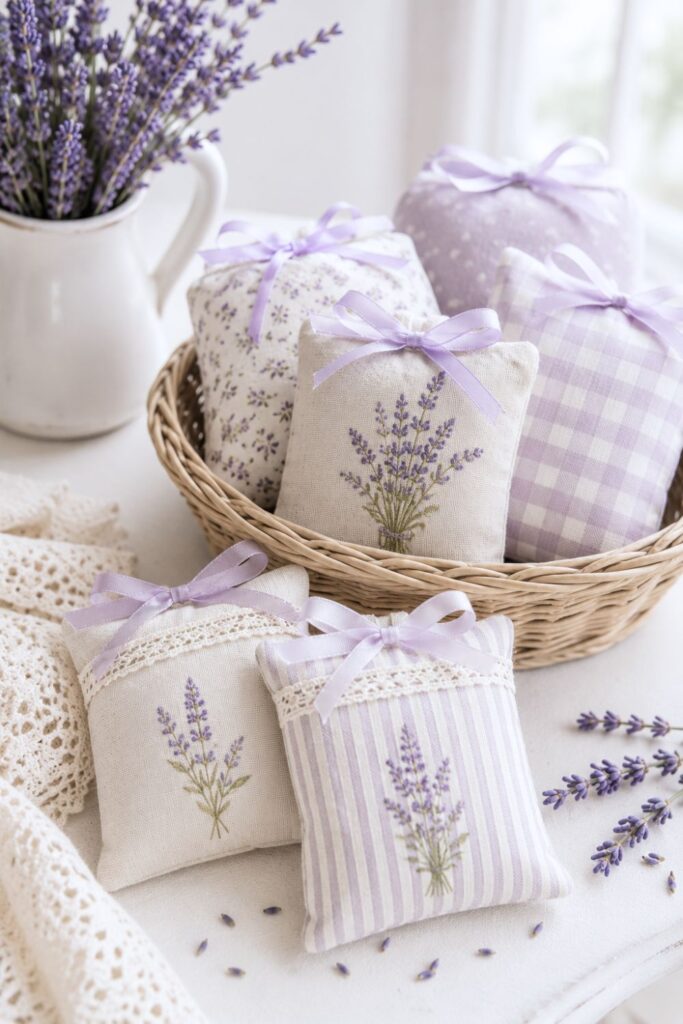
Few projects are as relaxing as sewing tiny lavender sachets. Simply stitch small fabric squares together, fill them with dried lavender, and tuck them into dresser drawers, closets, or linen cabinets. Every time you open the drawer, you’ll get a lovely burst of fresh floral fragrance.
You can also use them:
- Inside gift baskets
- Under your pillow
- In your suitcase
- In your car
- As party favors
How to Make Lavender Sachets
Lavender sachets are one of the easiest scrap fabric projects you can sew, and they make beautiful handmade gifts. In just a few minutes, you’ll have fragrant little pouches that can freshen up drawers, closets, and linen cabinets.
- Choose your fabric. Select two small pieces of cotton or linen fabric that coordinate well together.
- Cut your squares. Trim the fabric into matching squares or rectangles, depending on the size of sachet you’d like.
- Layer the fabric. Place the fabric pieces right sides together and pin them in place.
- Sew around the edges. Stitch around the perimeter, leaving a small opening for turning and filling.
- Turn the sachet right side out. Carefully turn the fabric, then press it flat with an iron.
- Fill with dried lavender. Add enough dried lavender buds to lightly fill the sachet without making it too bulky.
- Close the opening. Hand stitch or machine stitch the opening closed.
- Display or gift your sachet. Tuck it into a dresser drawer, closet, suitcase, or linen cabinet, or tie it onto a gift for an extra thoughtful touch.
Tip: For a longer-lasting fragrance, mix a few drops of lavender essential oil with the dried lavender buds before filling your sachets. You can also refresh the scent later by adding another drop or two of essential oil.
6. Scrunchies
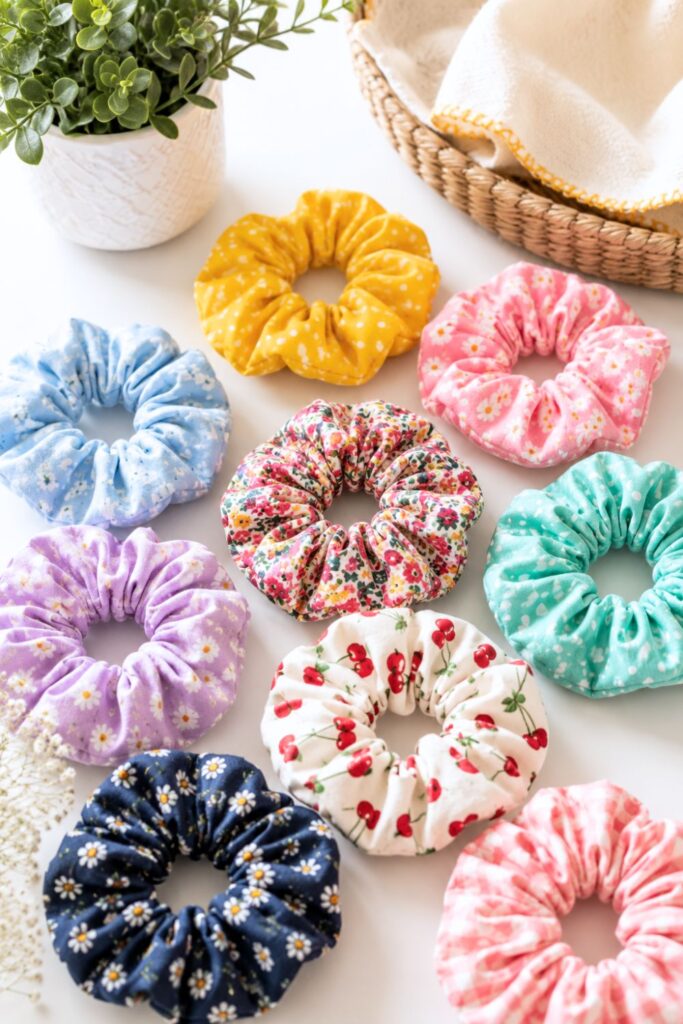
Scrunchies are one of the best beginner sewing projects because they require very little fabric, come together quickly, and are always useful. They’re a fantastic way to showcase colorful prints and make adorable gifts for friends, daughters, nieces, or coworkers.
The best part? One afternoon of sewing can leave you with an entire collection to match every outfit.
How to Make Scrunchies
Scrunchies are one of the quickest and most satisfying sewing projects you can make. They use very little fabric, are beginner-friendly, and are perfect for using colorful scraps.
- Choose your fabric. Lightweight cotton, satin, flannel, or knit fabrics all work well for scrunchies.
- Cut a fabric strip. Cut a long rectangle of fabric along with a piece of elastic.
- Fold the fabric. Fold the strip in half lengthwise with the right sides facing each other.
- Sew the long edge. Stitch along the long side to create a fabric tube.
- Turn the tube right side out. Use a safety pin, loop turner, or chopstick to make turning easier.
- Thread the elastic through. Attach a safety pin to one end of the elastic and feed it through the fabric tube.
- Tie or sew the elastic. Secure the ends of the elastic together with several stitches or a sturdy knot.
- Close the fabric opening. Tuck the raw edges inside one another and stitch the opening closed by hand or with your sewing machine.
Tip: Experiment with different fabric types and widths to create everything from slim everyday scrunchies to oversized, statement-making styles. They’re so quick to sew that it’s easy to make several in one afternoon!
7. Fabric Hair Bows
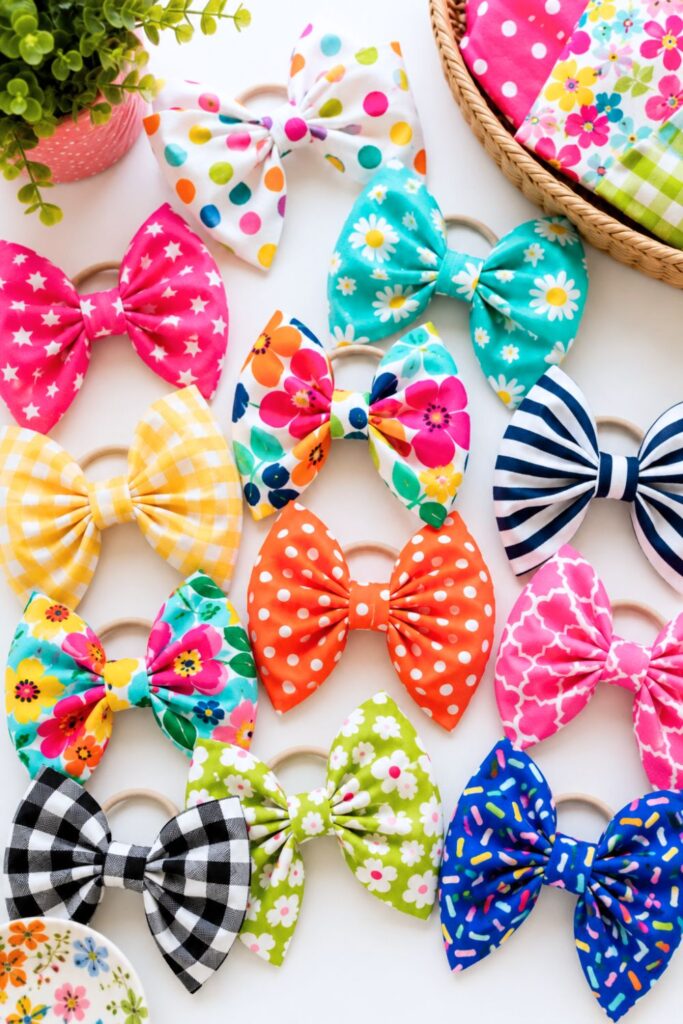
Whether you’re sewing for children, teens, or even yourself, fabric hair bows are a fun way to transform leftover fabric into something wearable. Attach them to clips, headbands, ponytail holders, or barrettes for endless styling options.
Popular fabric choices include:
- Cotton florals
- Linen
- Gingham
- Denim scraps
- Velvet for the holidays
How to Make Fabric Hair Bows
Fabric hair bows are a fun, beginner-friendly sewing project that can be customized with endless colors and patterns. They’re perfect for using small fabric scraps and make adorable gifts for kids, teens, and anyone who loves handmade accessories.
- Choose your fabric. Pick lightweight cotton or quilting fabric in fun prints or coordinating colors.
- Cut your fabric pieces. Cut rectangles for the bow, the center wrap, and any optional tails if you want a larger bow.
- Sew the bow piece. Fold the main rectangle in half with right sides together and stitch it into a tube.
- Turn and press. Turn the fabric right side out and press it flat with an iron.
- Form the bow. Fold the fabric into a loop, sew the ends together, then pinch the center to create the classic bow shape.
- Wrap the center. Sew or glue the small center strip tightly around the middle of the bow to hold its shape.
- Attach the hardware. Secure the finished bow to an alligator clip, barrette, headband, or hair elastic using hot glue or a few hand stitches.
- Add the finishing touches. Fluff the bow, trim any loose threads, and enjoy your handmade accessory!
Tip: Mix bright florals, polka dots, gingham, stripes, or playful seasonal prints to create bows for every holiday, outfit, or occasion. They also make wonderful craft fair items and thoughtful handmade gifts.
8. Reusable Makeup Remover Pads
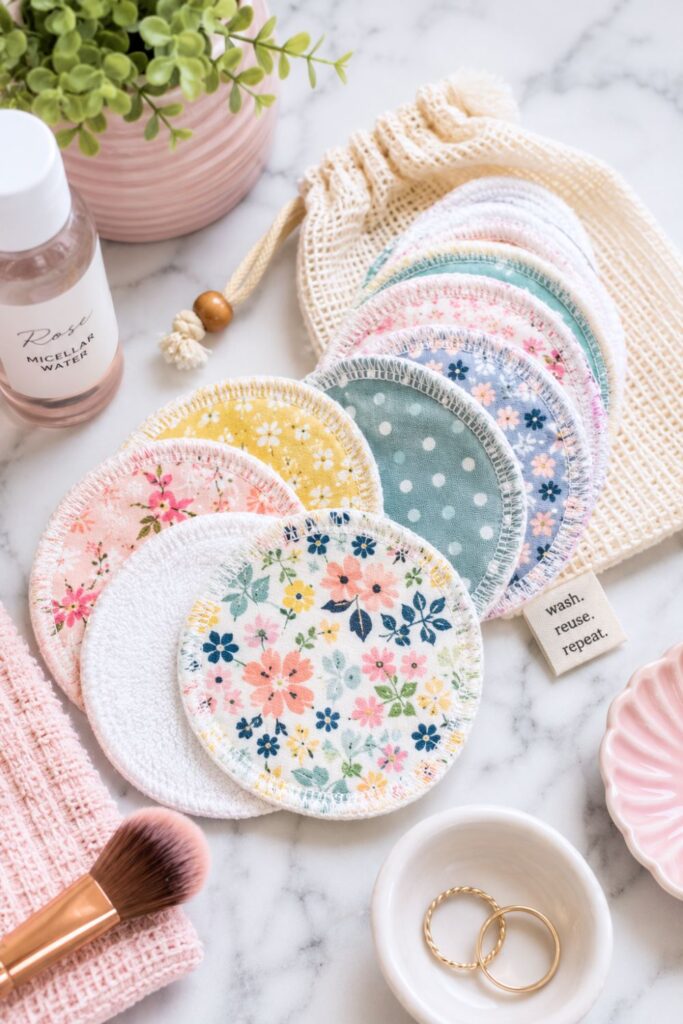
If you’re trying to cut down on disposable products, reusable makeup remover pads are a wonderful eco-friendly sewing project. Sew two soft layers together using cotton flannel, bamboo terry, or microfiber, then toss them in the wash after each use.
They’re:
- Budget friendly
- Sustainable
- Gentle on skin
- Great for everyday skincare routines
- Perfect for gifting with homemade soaps or spa items
How to Make Reusable Makeup Remover Pads
Reusable makeup remover pads are a simple sewing project that’s eco-friendly, budget-friendly, and perfect for using up small fabric scraps. You’ll have a stack ready to use in no time!
- Choose your fabrics. Use soft, absorbent fabrics like cotton flannel, cotton terry cloth, bamboo terry, or microfiber for the cleaning side, and cotton fabric for the back if desired.
- Cut your circles. Use a small round template, such as a mason jar lid or drinking glass, to cut matching fabric circles.
- Layer the fabrics. Place two fabric circles together with the right sides facing out, or sandwich an absorbent layer between them for extra softness.
- Pin or clip the layers. Secure the fabric pieces so they don’t shift while sewing.
- Sew around the edge. Stitch around the entire circle using a narrow seam allowance or a zigzag/serger stitch to finish the edges.
- Trim any uneven edges. Carefully trim loose threads or excess fabric for a clean finish.
- Wash before first use. Give the pads a quick wash to soften the fabric and remove any markings.
- Store them together. Keep your finished pads in a small basket, jar, or washable mesh laundry bag so they’re always ready to grab.
Tip: Make 12–20 pads at once so you always have clean ones on hand while the others are in the wash. Pair them with a small drawstring bag for an easy, thoughtful handmade gift.
9. Fabric Coasters
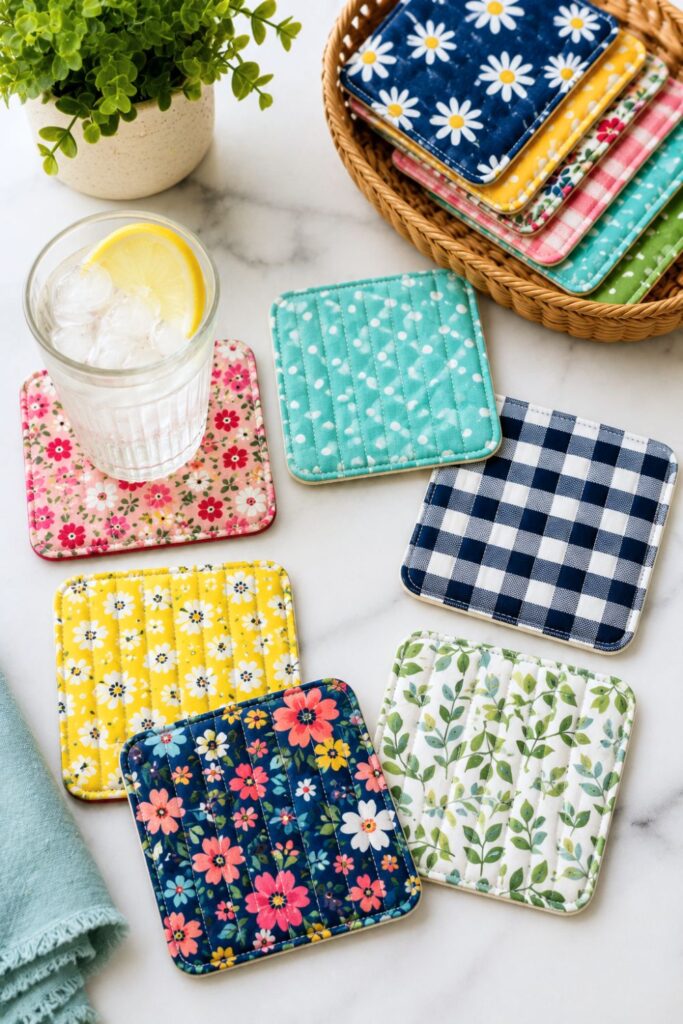
Fabric coasters are a simple project that instantly adds color to your coffee table or dining room. They’re fast enough to make in an evening and use only small scraps, making them one of the easiest stash-busting projects around.
Coordinate them with:
- Seasonal decor
- Holiday entertaining
- Kitchen color schemes
- Outdoor patio settings
- Handmade gifts
How to Make Fabric Coasters
Fabric coasters are one of the easiest scrap fabric projects you can sew. They come together quickly, use very little fabric, and make thoughtful handmade gifts for friends and family.
- Choose your fabric. Pick two coordinating cotton fabrics for each coaster, along with a layer of cotton batting or insulated batting for extra absorbency.
- Cut your pieces. Cut matching squares, circles, or another shape for the front, back, and batting.
- Layer the fabrics. Place the batting between the front and back fabric pieces, making sure everything is lined up evenly.
- Secure the layers. Pin or clip the pieces together so they stay in place while sewing.
- Quilt the coaster. Sew simple straight lines, diagonal lines, or another quilting design across the coaster to hold the layers together.
- Finish the edges. Add bias binding around the outside or sew the coaster right sides together, turn it right side out, and topstitch around the edge.
- Trim any loose threads. Give the coaster a neat, polished finish.
- Make a matching set. Repeat the process to create four or six coordinating coasters for your home or as a handmade gift.
Tip: Mix florals, gingham, stripes, seasonal prints, or bold modern fabrics to create coaster sets that match your kitchen, living room, or holiday décor. They also pair beautifully with a handmade mug rug or fabric basket as part of a thoughtful gift set.
10. Mug Rugs
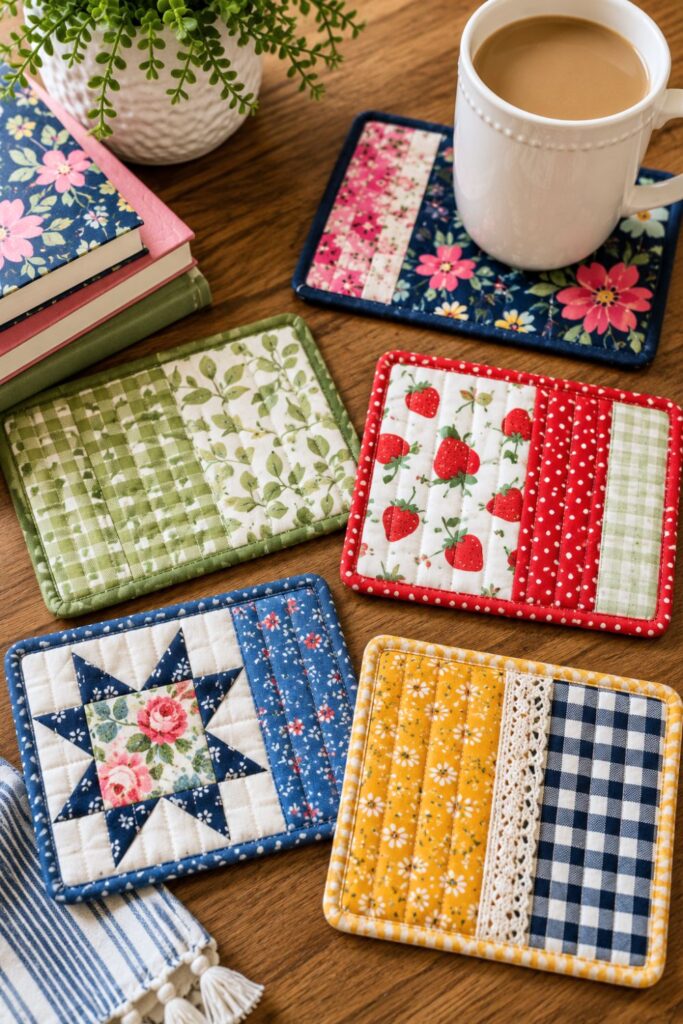
Think of a mug rug as a miniature placemat that’s just big enough for your favorite mug and a snack. These tiny quilted mats are incredibly satisfying to make because they let you experiment with patchwork designs, decorative stitching, and fun fabric combinations without committing to a large quilt.
They’re perfect for enjoying morning coffee, afternoon tea, or late-night hot cocoa while protecting your table from heat and spills. Plus, they make charming handmade gifts that almost everyone can use.
How to Make Mug Rugs
Mug rugs are like miniature placemats for your favorite cup of coffee or tea. They’re a fun way to practice simple quilting techniques while using up fabric scraps that might otherwise go to waste.
- Choose your fabrics. Gather several coordinating cotton fabric scraps for the front, along with backing fabric and cotton batting.
- Create your design. Arrange your fabric pieces into a simple patchwork pattern or quilt block that fits the size of your mug rug.
- Sew the patchwork together. Stitch the pieces into rows, then sew the rows together to create the front panel.
- Press the seams. Iron all of the seams flat for a neat, professional-looking finish.
- Layer the mug rug. Place the backing fabric right side down, add the batting, and then place the patchwork front right side up.
- Quilt the layers. Sew straight lines or a decorative quilting pattern across the entire mug rug to hold everything together.
- Finish the edges. Add bias binding around the outside or sew the layers right sides together, turn them right side out, and topstitch around the edge.
- Enjoy your handmade mug rug. Set your favorite mug and a cookie, muffin, or small snack on top for a cozy coffee break.
Tip: Mug rugs are the perfect place to try new quilting blocks, decorative stitches, or seasonal fabrics without committing to a full-sized quilt. They’re also wonderful handmade gifts for teachers, neighbors, coworkers, and coffee-loving friends.
11. Zipper Coin Pouches
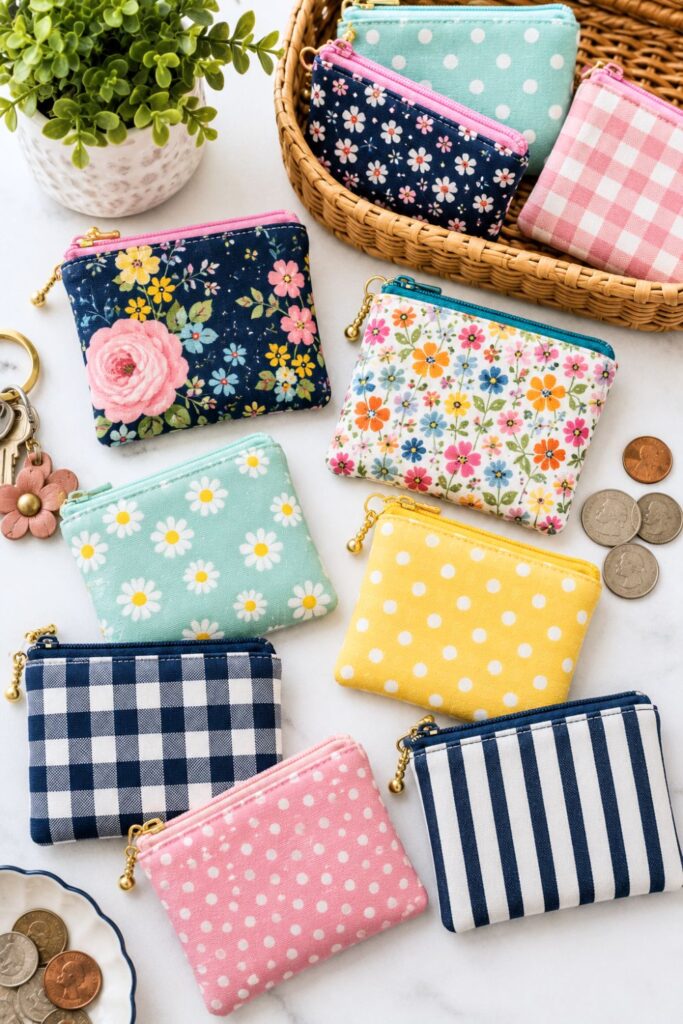
Zipper coin pouches are one of those projects you’ll find yourself making over and over again. They’re perfect for using colorful fabric scraps while creating something that’s actually useful. Keep one in your purse for loose change, earbuds, gift cards, or other small essentials that always seem to disappear.
They’re perfect for storing:
- Coins
- Lip balm
- Earbuds
- Hair ties
- Small sewing supplies
- Gift cards
How to Make Zipper Coin Pouches
Zipper coin pouches are a fun intermediate sewing project that’s both practical and giftable. Once you learn the basic technique, you’ll be able to make them in all kinds of sizes for coins, earbuds, cards, makeup, and other small essentials.
- Choose your fabric. Select coordinating cotton fabrics for the outside and lining, along with a small zipper and lightweight interfacing.
- Cut your pieces. Cut the outer fabric, lining fabric, and interfacing to the same size.
- Apply the interfacing. Iron the interfacing onto the wrong side of the outer fabric to give the pouch extra structure.
- Sew in the zipper. Attach the zipper between the outer fabric and lining using a zipper foot, then repeat for the opposite side.
- Open the zipper halfway. This is important so you’ll be able to turn the pouch right side out later.
- Sew around the edges. Place the outer fabrics together and the lining fabrics together, then stitch around the perimeter, leaving a small opening in the lining.
- Turn the pouch right side out. Pull the pouch through the opening in the lining, then stitch the lining closed.
- Push out the corners and press. Zip your pouch closed, give it a final press, and it’s ready to use!
Tip: Add a small fabric tab, key ring, wrist strap, or decorative zipper pull to make your coin pouch even more functional. They make fantastic stocking stuffers, teacher gifts, and craft fair best sellers.
12. Pencil Cases
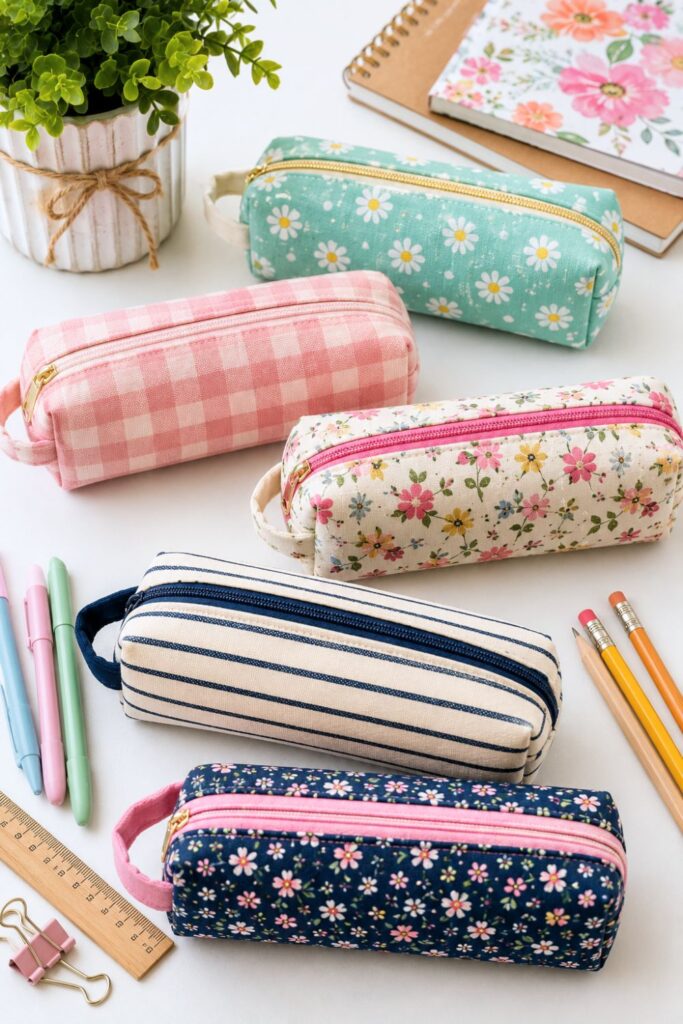
Whether you’re sewing for students, teachers, artists, or yourself, a handmade pencil case is always a practical project. Add a zipper and a fun fabric lining to create a sturdy case that’s both functional and stylish.
You can easily customize them with favorite colors, patchwork panels, or even quilted fabric for extra durability.
How to Make Pencil Cases
A handmade pencil case is a practical project that’s perfect for beginners who are ready to try sewing a zipper. It’s a great way to use larger fabric scraps and makes an excellent gift for students, teachers, artists, and anyone who loves stationery.
- Choose your fabric. Select coordinating cotton fabrics for the outside and lining, along with lightweight interfacing and a zipper.
- Cut your pieces. Cut the outer fabric, lining fabric, and interfacing to the desired size of your pencil case.
- Apply the interfacing. Iron the interfacing onto the wrong side of the outer fabric to help the pencil case hold its shape.
- Attach the zipper. Sew the zipper between the outer fabric and lining using a zipper foot, then repeat on the opposite side.
- Open the zipper halfway. This makes it much easier to turn the finished pencil case right side out later.
- Sew the sides together. Place the outer fabrics right sides together and the lining fabrics right sides together, then stitch around the edges, leaving a small opening in the lining.
- Turn and finish. Turn the pencil case right side out through the lining opening, stitch the opening closed, and push out the corners.
- Fill it with supplies. Zip it up and fill your new pencil case with pens, pencils, markers, scissors, or other favorite stationery.
Tip: Add a fabric pull tab, boxed corners, or a wrist strap for a more professional finish. These pencil cases are also perfect for storing crochet hooks, makeup brushes, charging cables, or small sewing supplies.
13. Glasses Cases
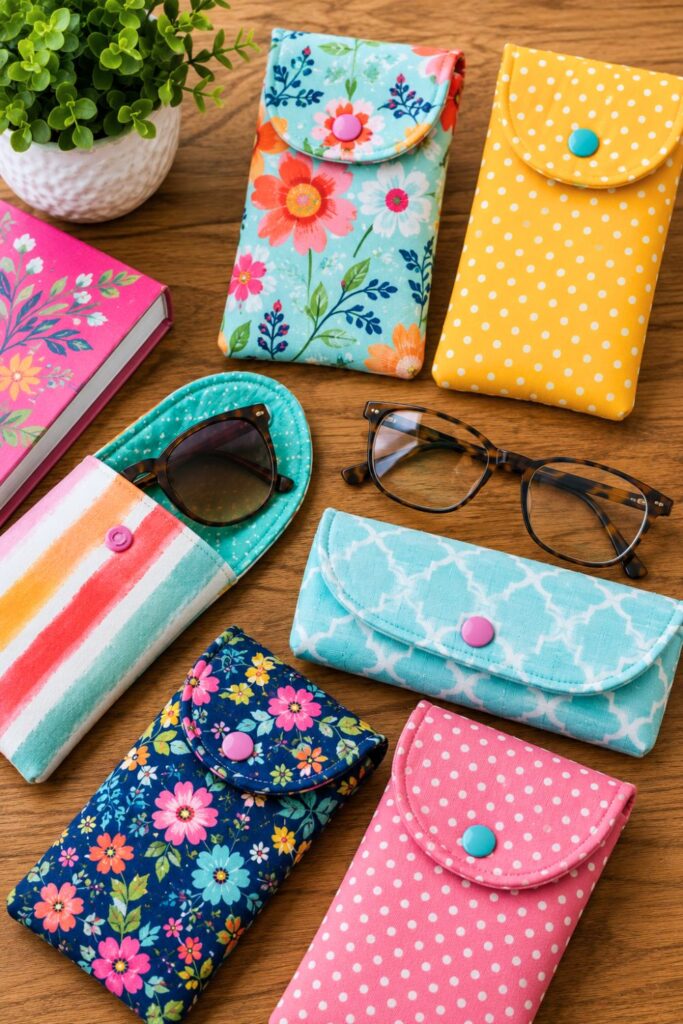
Protect your reading glasses or sunglasses with a soft fabric case that’s much prettier than the one that came from the store. Add batting between the layers for extra cushioning, and finish it with a snap, button, or zipper closure.
Some fun fabric ideas include:
- Vintage florals
- Modern geometric prints
- Cottagecore-inspired fabrics
- Linen blends
- Holiday prints for seasonal gifts
How to Make Fabric Glasses Cases
A handmade fabric glasses case is a wonderful way to protect your reading glasses or sunglasses while adding a pop of personality. They’re beginner-friendly, use very little fabric, and make thoughtful gifts for family and friends.
- Choose your fabric. Select a cotton fabric for the outside, a coordinating lining, and lightweight batting or foam interfacing for extra padding.
- Cut your pieces. Cut the outer fabric, lining, and batting using the same pattern or measurements.
- Quilt the outer fabric (optional). Sew simple quilting lines through the outer fabric and batting for extra texture and durability.
- Layer the materials. Place the outer fabric and lining right sides together with the batting attached to the outer fabric.
- Sew around the edges. Stitch the pieces together, leaving an opening for turning if your pattern requires it.
- Turn and press. Turn the case right side out, gently push out the corners, and press it flat with an iron.
- Add a closure. Sew on a snap, button and loop, magnetic snap, or hook-and-loop closure to keep your glasses secure.
- Slide in your glasses. Your handmade case is ready to protect your favorite pair of glasses wherever you go.
Tip: Add a small fabric tab, wrist loop, or personalized label to make your glasses case even more special. They’re also great for storing sunglasses, blue-light glasses, small electronics, or even crochet hooks when you’re on the go.
14. Key Fobs
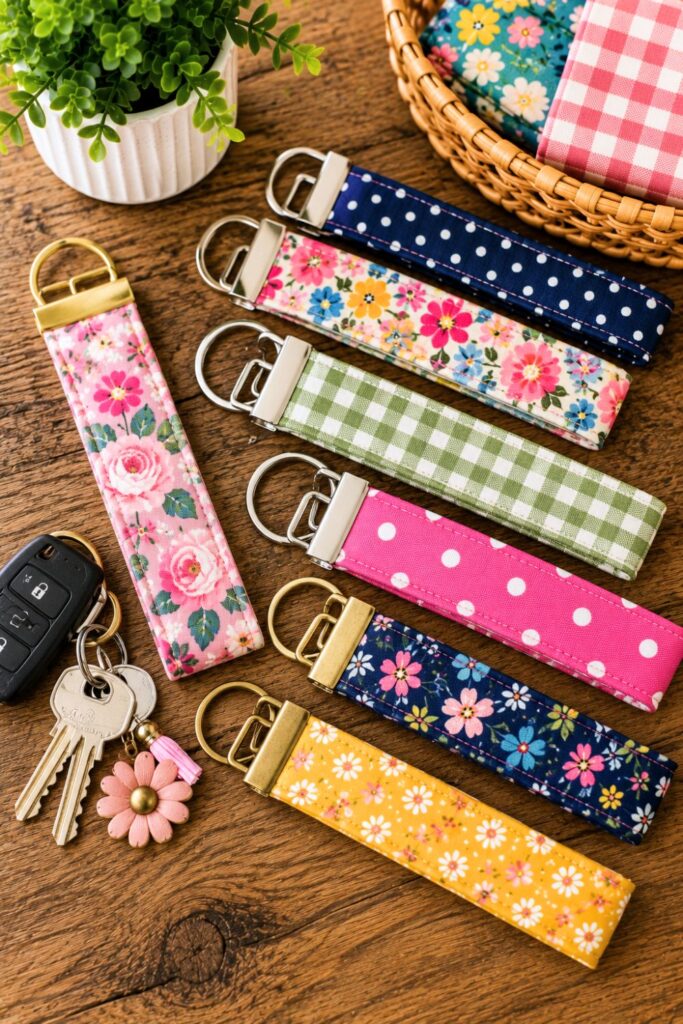
Key fobs are one of the fastest sewing projects you can make, but they’re surprisingly useful. Simply fold fabric around sturdy webbing and attach a key ring for an easy wrist strap that makes finding your keys so much easier.
They’re great for:
- House keys
- Car keys
- Teacher gifts
- Stocking stuffers
- Craft fair items
How to Make Fabric Key Fobs
Fabric key fobs are one of the quickest sewing projects you can make, and they’re incredibly useful for keeping track of your keys. They use very little fabric, come together in minutes, and make fantastic gifts and craft fair items.
- Choose your fabric. Pick a sturdy cotton fabric and a strip of cotton webbing for extra strength.
- Cut your materials. Cut a strip of fabric slightly wider than the webbing and long enough to create your desired wrist strap.
- Attach the fabric to the webbing. Fold the fabric around the webbing, press it, and stitch along both long edges to secure it.
- Fold the strap in half. Bring the short ends together to create a loop that will fit comfortably around your wrist.
- Slide on the key fob hardware. Insert both raw ends into the metal key fob clamp.
- Secure the hardware. Use pliers (with a scrap piece of fabric to protect the finish) to firmly crimp the hardware closed.
- Add the key ring. Slide a split key ring onto the hardware.
- Attach your keys. Your new fabric key fob is ready to use!
Tip: Bright florals, gingham, polka dots, stripes, seasonal prints, and sports-themed fabrics all make fun key fobs. You can also add a personalized tag, tassel, or charm to make each one unique or create matching sets for gifts.
15. Chapstick Holders
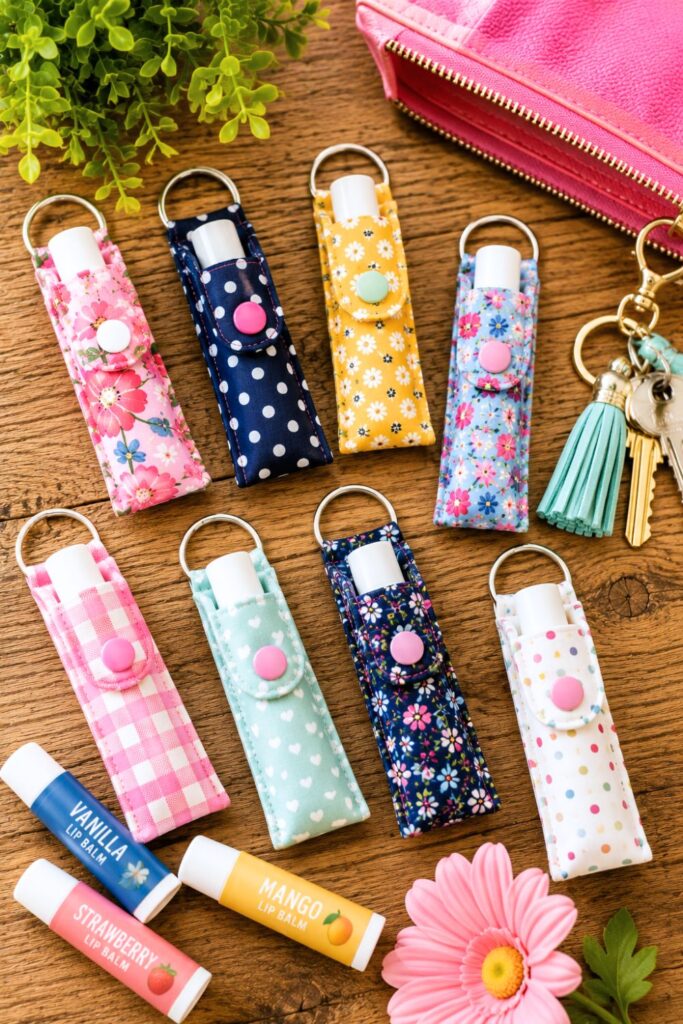
If you’re constantly digging through your purse looking for lip balm, this tiny project is about to become your new favorite. Chapstick holders clip onto keychains, backpacks, diaper bags, or purses so your lip balm is always within reach.
They’re:
- Beginner friendly
- Great scrap busters
- Fast to sew
- Perfect for gift sets
- Fun to personalize with colorful fabrics
How to Make Chapstick Holders
Fabric chapstick holders are one of the fastest scrap fabric projects you can sew. They’re perfect for clipping onto your keys, purse, backpack, or diaper bag so your lip balm is always easy to find.
- Choose your fabric. Pick a sturdy cotton fabric along with lightweight interfacing to help the holder keep its shape.
- Cut your pieces. Cut the outer fabric, lining (if using), interfacing, and a small tab for attaching the key ring.
- Apply the interfacing. Iron the interfacing onto the wrong side of the outer fabric.
- Sew the holder. Fold and stitch the fabric to create a snug sleeve that will hold a standard tube of lip balm.
- Create the loop. Fold the small fabric tab, stitch it, and attach it to the top of the holder for the key ring.
- Add the closure. Sew on a snap, button, or hook-and-loop fastener to keep the lip balm securely in place.
- Attach the hardware. Slide on a split key ring or lobster clasp so the holder can clip onto keys, purses, or backpacks.
- Insert your lip balm. Slip your favorite chapstick into the holder, snap it closed, and you’re ready to go!
Tip: These tiny projects are excellent for using leftover fabric scraps that are too small for larger sewing projects. Make several in coordinating prints—they’re popular craft fair items, stocking stuffers, teacher gifts, and thoughtful additions to gift baskets.
16. Lanyards
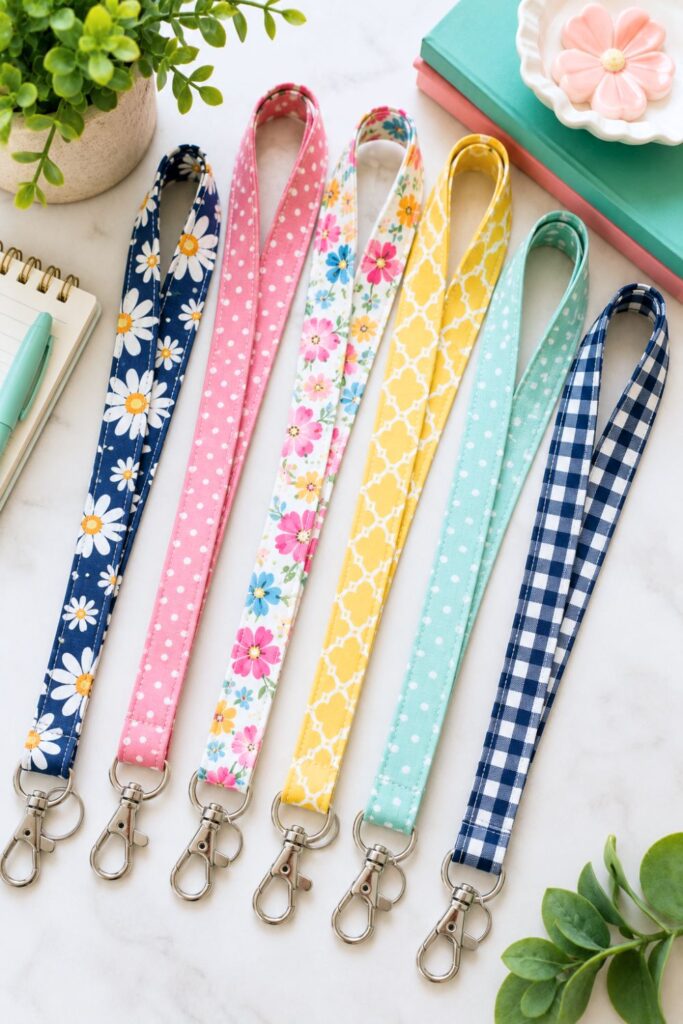
A handmade fabric lanyard is both comfortable to wear and easy to customize. Whether you use it for work, school, conferences, or craft fairs, it’s a simple project that turns even narrow fabric scraps into something practical.
Ideas for using fabric lanyards:
- Employee ID badges
- Teacher badges
- Keys
- Small wallets
- Event passes
How to Make Fabric Lanyards
Fabric lanyards are an easy sewing project that’s both stylish and practical. They’re perfect for holding keys, ID badges, name tags, or small wallets, and they make wonderful gifts for teachers, nurses, office workers, and students.
- Choose your materials. Select a strip of cotton fabric, cotton webbing for added strength, and a swivel clasp or key ring.
- Cut the fabric. Cut a long strip of fabric slightly wider than the webbing and the desired finished length of your lanyard.
- Apply the fabric to the webbing. Fold the fabric around the webbing, press it flat, and sew along both long edges to secure it.
- Attach the clasp. Slide the swivel clasp or key ring onto the strap before joining the ends.
- Form the loop. Bring the two short ends together, overlapping them slightly.
- Sew the ends together. Stitch several rows across the overlap to create a strong, secure seam.
- Cover the seam (optional). Wrap a small strip of matching fabric around the seam and stitch it in place for a polished, professional look.
- Start using your lanyard. Clip on your ID badge, keys, or small accessories, and it’s ready to wear.
Tip: Use fun seasonal prints, florals, gingham, school colors, or holiday fabrics to create personalized lanyards for gifts, teacher appreciation, conferences, or everyday use. They’re quick to sew and are always popular at craft fairs.
17. Patchwork Tote Bags
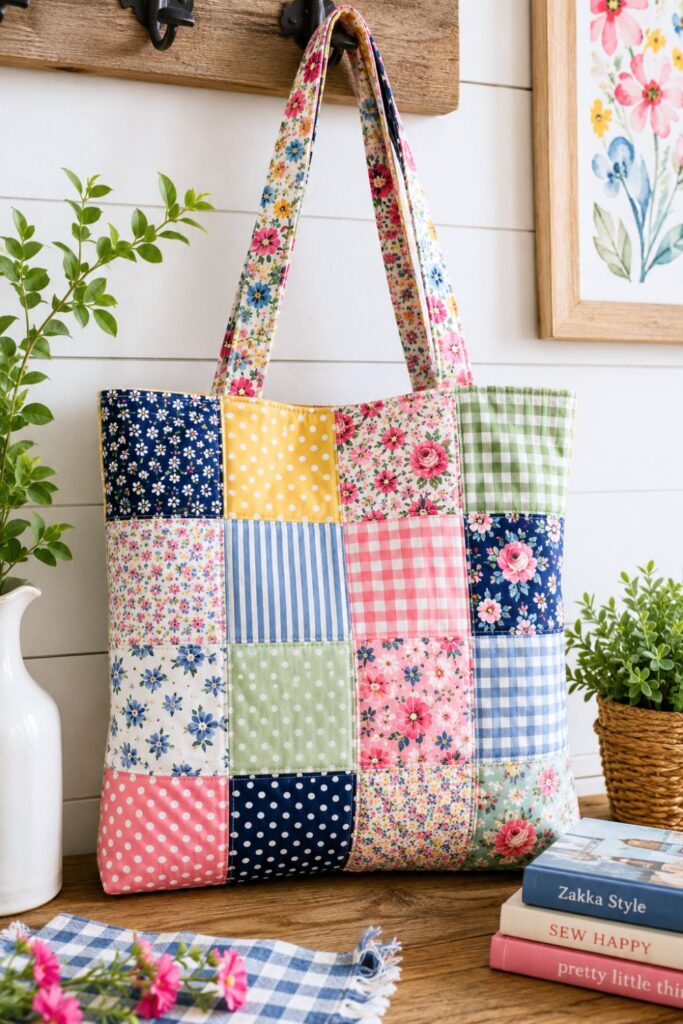
Patchwork tote bags are one of the best ways to show off your favorite fabric scraps while making something you’ll use every week. Combine coordinating fabrics to create a completely unique bag that’s perfect for grocery shopping, library books, beach days, or everyday errands.
The more fabrics you mix together, the more personality your tote will have.
How to Make a Patchwork Tote Bag
A patchwork tote bag is a fantastic way to turn your favorite fabric scraps into something beautiful and practical. It’s a fun project for confident beginners and makes a sturdy bag you’ll reach for again and again.
- Gather your fabric scraps. Choose coordinating cotton fabrics in colors and patterns you love for the patchwork front and back.
- Cut your patchwork pieces. Trim your scraps into equal-sized squares or rectangles for an organized design.
- Sew the patchwork panels. Stitch the pieces together into rows, then sew the rows together to create the front and back of the tote bag.
- Press the seams. Iron each seam flat to give your patchwork a neat, professional finish.
- Add interfacing. Fuse interfacing to the back of the patchwork panels if you’d like a sturdier tote that holds its shape.
- Cut the lining and straps. Prepare the lining fabric and sew sturdy fabric handles or cotton webbing straps.
- Assemble the bag. Sew the front and back together, attach the lining, and securely stitch the handles into place.
- Turn and finish. Turn the tote right side out, press it, topstitch around the opening, and your bag is ready to use!
Tip: Add inside pockets, a magnetic snap, or a zippered closure to make your tote even more functional. Patchwork tote bags are perfect for grocery shopping, library books, farmers markets, beach days, craft supplies, or everyday errands.
18. Reversible Placemats
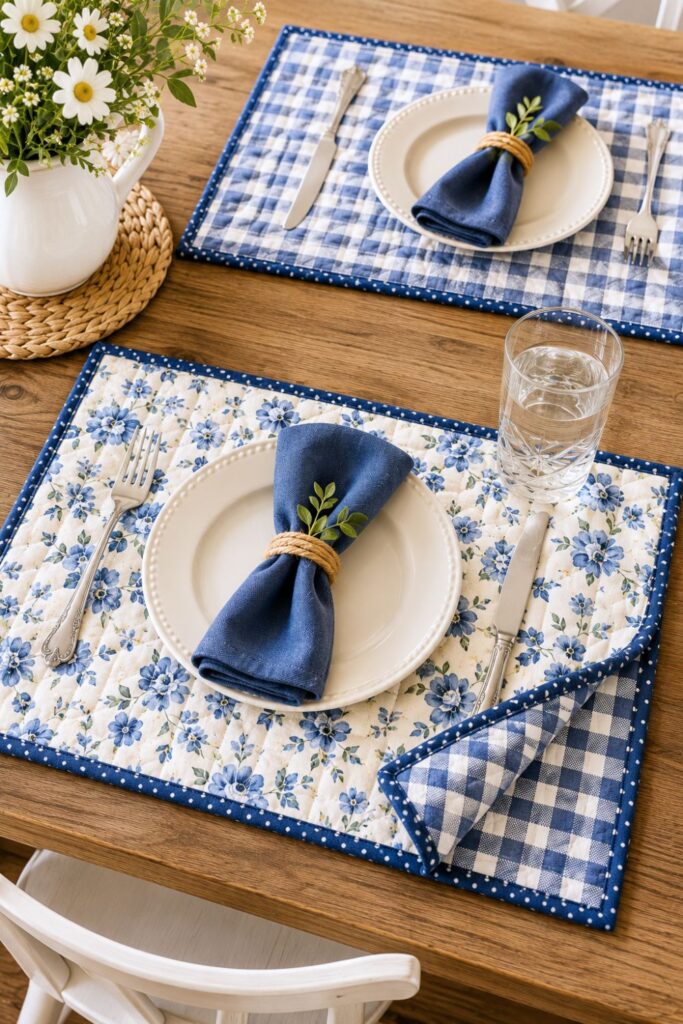
Why settle for one design when you can have two? Reversible placemats let you switch up your table décor with a simple flip. They’re an excellent project for holiday fabrics, seasonal prints, or coordinating kitchen colors.
They’re ideal for:
- Everyday dining
- Holiday entertaining
- Housewarming gifts
- Wedding presents
- Family gatherings
How to Make Reversible Placemats
Reversible placemats are a simple sewing project that gives you two beautiful looks in one. They’re perfect for everyday meals, seasonal decorating, or special occasions, and they’re a great way to use coordinating fabric scraps.
- Choose two fabrics. Select two coordinating cotton fabrics—one for each side of the placemat.
- Cut your pieces. Cut both fabric pieces to the same size, and cut a layer of cotton batting or fusible fleece if you’d like a little extra padding.
- Layer the materials. Place the two fabrics right sides together with the batting on top or attached to one side, depending on the type you’re using.
- Sew around the edges. Stitch around the placemat, leaving a small opening so you can turn it right side out.
- Trim and clip the corners. Trim the seam allowance and clip the corners to reduce bulk and help them turn neatly.
- Turn and press. Turn the placemat right side out through the opening and press it flat with an iron.
- Topstitch around the edge. Sew a neat topstitch around the entire placemat to close the opening and give it a finished look.
- Make a matching set. Repeat the process to create four, six, or eight coordinating placemats for your table.
Tip: Pair seasonal prints on one side with a neutral fabric on the other so you can easily switch between holiday décor and everyday dining with a simple flip. They also make wonderful handmade wedding, hostess, and housewarming gifts.
19. Cloth Napkins
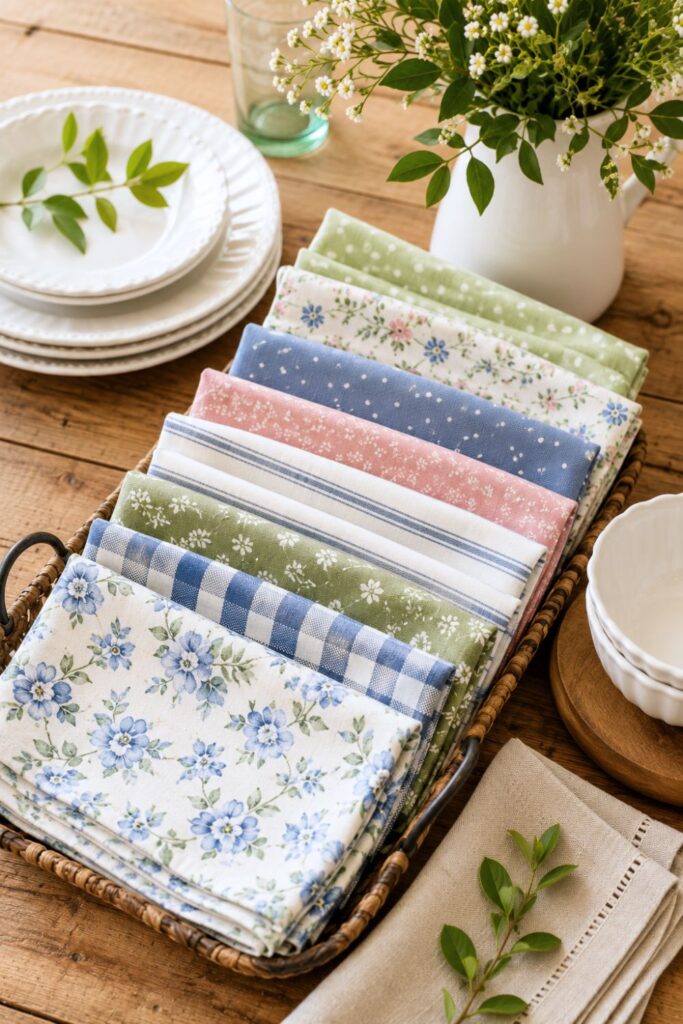
Reusable cloth napkins are an easy way to make everyday meals feel a little more special. They’re beginner friendly, environmentally friendly, and require very little fabric. Mix and match prints for a relaxed, collected look or sew matching sets for a more polished table.
Best fabrics include:
- Cotton
- Linen
- Cotton-linen blends
- Lightweight canvas
- Chambray
How to Make Cloth Napkins
Cloth napkins are one of the easiest sewing projects for beginners and a wonderful way to reduce paper waste while adding a handmade touch to your table. They sew up quickly and are a great way to use larger fabric scraps or coordinating quilting cotton.
- Choose your fabric. Select 100% cotton or linen fabric that’s soft, durable, and washable.
- Cut your napkins. Cut fabric squares to your preferred size, typically between 16 and 20 inches for everyday use.
- Press the edges. Fold each edge over about ¼ inch, press with an iron, then fold it over again to create a clean double-fold hem.
- Miter the corners (optional). Fold and trim the corners before hemming for a more polished, professional finish.
- Pin or clip the hems. Secure the folded edges so they stay in place while sewing.
- Sew around the perimeter. Stitch close to the inside folded edge, keeping your seams as straight as possible.
- Give them a final press. Iron each finished napkin so the edges are crisp and neat.
- Set the table. Fold or roll your cloth napkins and pair them with napkin rings for a beautiful everyday or holiday table setting.
Tip: Sew several coordinating sets using florals, gingham, stripes, solids, or seasonal prints so you can easily switch up your table décor throughout the year. Handmade cloth napkins also make thoughtful housewarming, wedding, and hostess gifts.
20. Bread Basket Liners
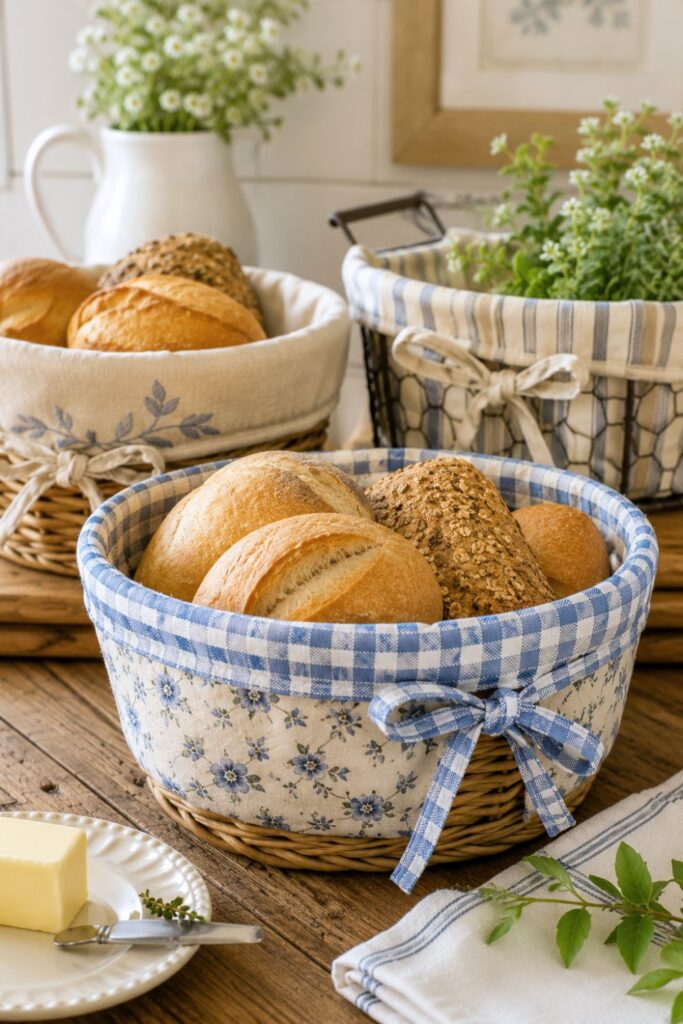
Nothing makes fresh rolls or homemade bread look more inviting than a pretty fabric basket liner. Simply line a woven basket with soft cotton fabric to keep bread warm while adding a cozy farmhouse touch to your table.
These are especially lovely for:
- Family dinners
- Holiday meals
- Brunch spreads
- Potluck gatherings
- Homemade bread gifts
How to Make a Bread Basket Liner
A fabric bread basket liner is a simple sewing project that adds a cozy, homemade touch to family dinners, holiday meals, and fresh-baked bread. It’s an easy way to dress up an ordinary basket while helping keep bread warm.
- Choose your fabric. Select 100% cotton or linen fabric that’s soft, durable, and washable.
- Measure your basket. Measure the inside diameter (or length and width) and the height of your basket to determine how large your liner should be.
- Cut the fabric. Cut one large circle or rectangle, depending on the shape of your basket, allowing extra fabric to fold over the edges.
- Finish the edges. Fold the raw edges over twice to create a clean double-fold hem, then press with an iron.
- Sew the hem. Stitch all the way around the liner to create a finished edge.
- Add decorative details (optional). Sew on ribbon, lace trim, embroidery, or fabric ties for extra charm.
- Press the finished liner. Give it a final ironing so it fits neatly inside the basket.
- Line your basket. Place the liner inside your bread basket, fold the edges over the rim, and fill it with warm rolls, biscuits, or homemade bread.
Tip: Make several liners in different fabrics for each season or holiday. Floral prints are beautiful for spring, gingham is perfect for summer picnics, plaid works wonderfully for fall, and festive holiday fabrics instantly dress up your Christmas dinner table.
21. Reusable Snack Bags
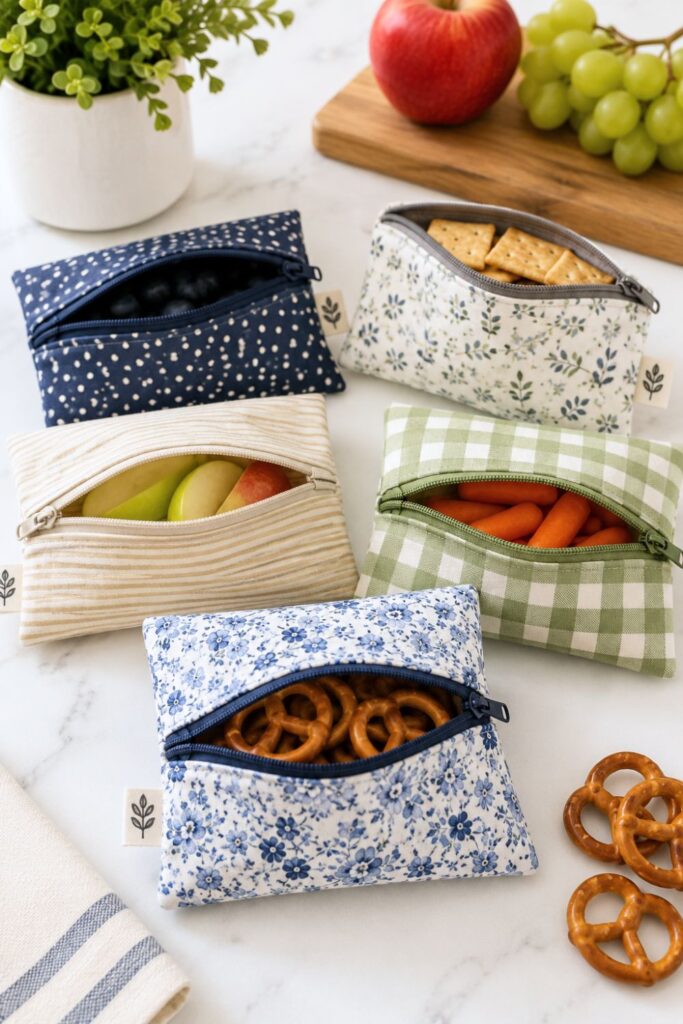
Skip the disposable plastic bags and sew your own reusable snack bags instead. They’re perfect for packing crackers, pretzels, fruit, sandwiches, and other lunchbox favorites. Choose food-safe lining fabric and add a zipper or hook-and-loop closure for easy use.
They’re perfect for:
- School lunches
- Road trips
- Office snacks
- Picnic lunches
- Reducing household waste
How to Make Reusable Snack Bags
Reusable snack bags are a practical sewing project that’s perfect for packing lunches while reducing single-use plastic bags. They’re easy to customize with fun fabrics and make wonderful gifts for families, teachers, and anyone trying to live a little more sustainably.
- Choose your materials. Select a cotton fabric for the outside and a food-safe, waterproof lining such as PUL or another washable food-safe fabric.
- Cut your fabric pieces. Cut matching rectangles for the outer fabric and lining in your preferred snack bag size.
- Place the fabrics together. Layer the outer fabric and lining with the right sides facing each other.
- Sew around the edges. Stitch around the bag, leaving a small opening so you can turn it right side out.
- Turn and press. Carefully turn the bag right side out and gently press the outer fabric, avoiding high heat if your lining requires it.
- Close the opening. Topstitch around the entire bag to seal the opening and give it a clean, finished look.
- Add a closure. Sew on a zipper, hook-and-loop fastener, snaps, or a fold-over flap, depending on your preferred style.
- Fill with your favorite snacks. Pack crackers, fruit, sandwiches, veggies, popcorn, or trail mix and enjoy using your handmade snack bag again and again.
Tip: Make several bags in different sizes for everything from crackers and granola bars to sandwiches and fresh fruit. Bright, colorful fabrics make lunchtime more fun, and reusable snack bags are excellent gifts for back-to-school season, teachers, and busy families.
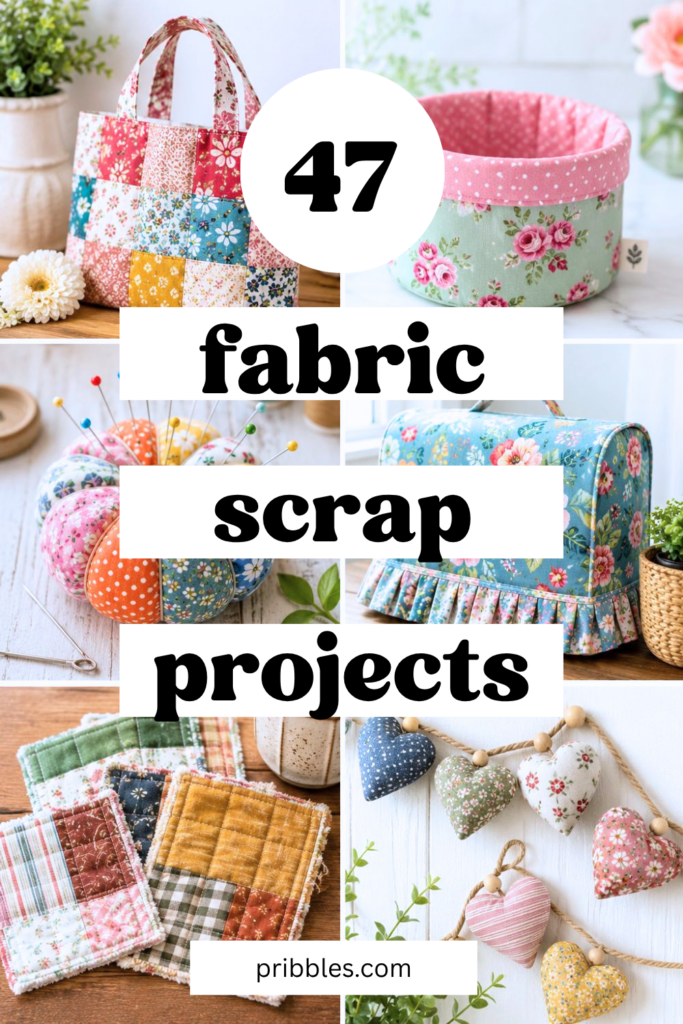
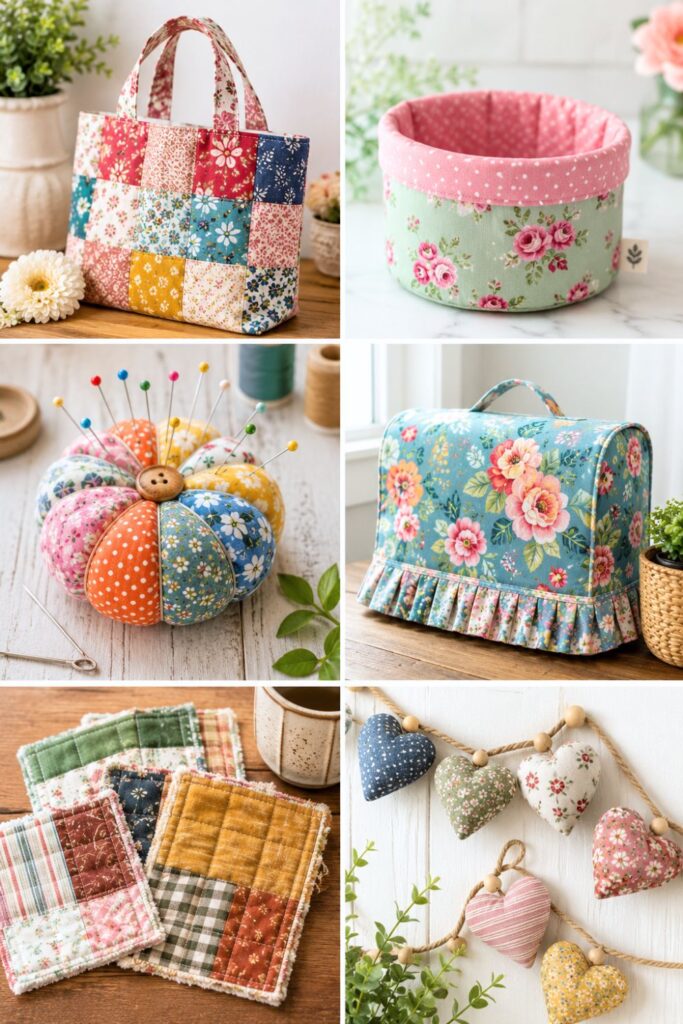
Even More Fabric Scrap Ideas
- Produce Bags
- Reversible Fabric Baskets
- Pin Cushions
- Needle Books
- Sewing Machine Cover
- Fabric Catch-All Tray
- Hanging Kitchen Towels
- Tea Towels with Fabric Trim
- Quilted Table Runner
- Seasonal Fabric Garland
- Fabric Bunting Banner
- Patchwork Christmas Ornaments
- Fabric Pumpkins
- Fabric Hearts
- Stuffed Fabric Stars
- Children’s Soft Fabric Blocks
- Doll Blankets
- Pet Bandanas
- Catnip Toys for Cats
- Dog Tug Toy Made from Fabric Strips
- Fabric Gift Bags
- Journal Covers
- Patchwork Wall Hanging
- Slow Stitch Fabric Journal Cover
- Denim & Scrap Fabric Patchwork Quilt
- Fabric Flower Brooches