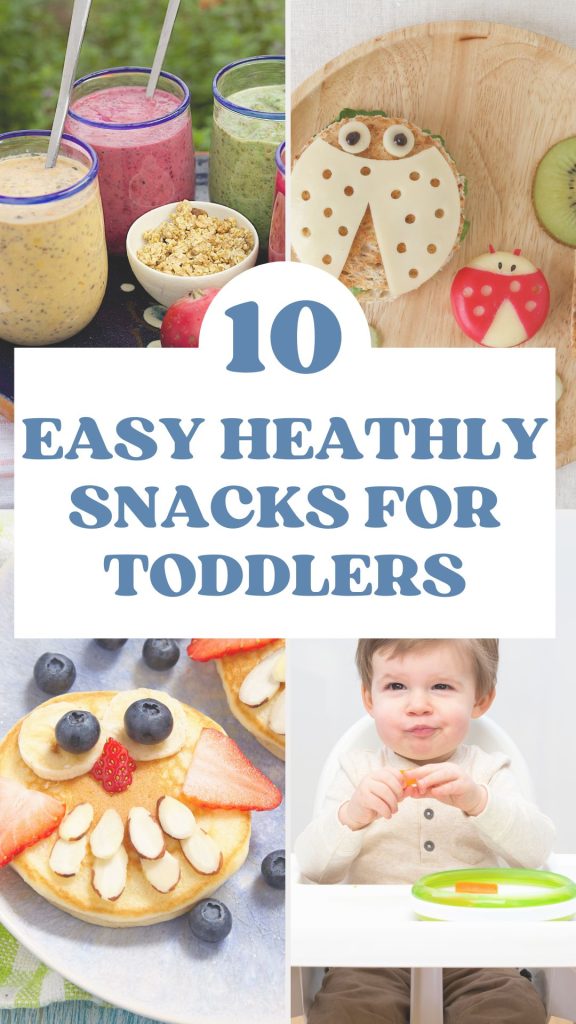
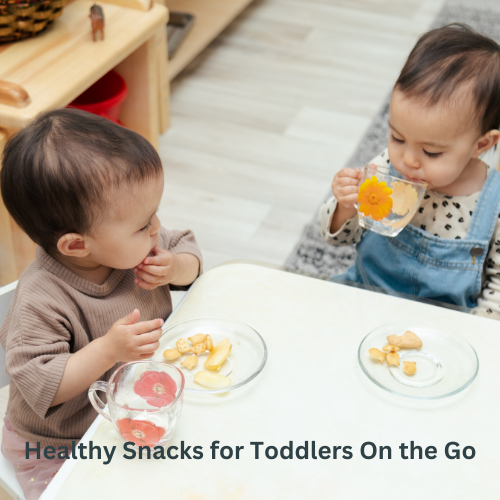
10 Healthy Snacks for Toddlers On the Go
This article talks all about healthy snacks for toddlers on the go and the best snacks for the little ones, even the pickiest of toddlers.
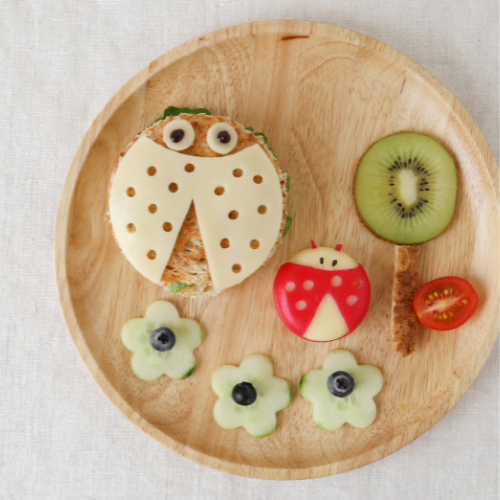
Check out these healthy snack ideas for toddlers, along with some tips and tricks to make them fun and interesting!
Snacking is an essential part of a toddler’s daily nutrition. Snacking enables toddlers to receive the necessary nutrients in small portions throughout the day.
Since a significant portion of a toddler’s daily nutrition comes from snacking, it’s crucial for parents and caregivers to provide a variety of healthy food choices.
This allows toddlers to get the nutrition they need but also introduces them to new, healthy food options.
Healthy Snack Box
One great option in helping your little ones get healthy snacks is Healthy Snack Boxes and they’re offering a free sample box while supplies last.
They’ll send you a box filled with delicious healthy snacks and all you need to do is let them know what you think. Shipping is free. No credit card is required.
Click here to claim your free snack box.
Some restrictions apply.
Pin It
Affiliate links may be used in this post and if so I will receive a commission at no extra cost. I’m also part of the Amazon Affiliate (Associate) program where I earn a commission from sales made through my affiliate links. Read the full disclosure policy.
Related reading:
Healthy Snacks for Toddlers on the Go
When my kids were toddlers, I loved making them healthy homemade snacks that were perfectly sized for their little fingers and safe for them to eat.
I’d often prepare a small plate or cup for fruits that could spill, allowing them to snack throughout the day without making a mess.
We made snacking fun by having picnics in the yard or enjoying our treats while watching an episode of Backyardigans.
This not only ensured they got the nutrition they needed but also created delightful moments and fond memories together.
Below you’ll find 17 easy and tasty toddler snacks that are healthy and delicious all at the same time.
1- Apple Cookies
Apple cookies are a delightful and nutritious snack option for toddlers, perfect for little fingers and sure to please even the pickiest eaters. Here’s a simple way to prepare them using wholesome ingredients:
Ingredients:
Fresh apples (any variety)
Peanut butter or other nut/seed butters (such as almond butter or sunflower seed butter for nut allergies)
Chopped nuts (optional, and ensure they are finely chopped for safety)
Granola
Raisins
Dried fruit (such as cranberries or apricots, chopped into small pieces)
Mini chocolate chips (optional, for a touch of sweetness)
Instructions:
Prepare the Apples: Wash and core the apples. Slice them into rings about 1/4 inch thick.
Spread the Butter: Generously spread peanut butter or your chosen nut/seed butter on one side of each apple ring.
Add Toppings: Sprinkle a variety of toppings on the peanut butter. You can mix and match:
Chopped nuts for crunch and added protein.
Granola for a crunchy texture and extra fiber.
Raisins for natural sweetness.
Dried fruit for chewy bites of flavor.
Mini chocolate chips for a fun and sweet surprise.
Tips:
Customization: Feel free to customize the toppings based on your toddler’s preferences and dietary restrictions.
Safety: Ensure all toppings are appropriately sized to prevent choking. For younger toddlers, finely chop nuts and dried fruit.
Serving: Serve immediately to prevent the apples from browning, or brush the apple slices with a bit of lemon juice to keep them fresh longer.
Apple cookies are a fantastic way to provide a variety of textures and flavors, making snack time both nutritious and exciting for your little ones.

2- Frozen Yogurt Bark
Ingredients:
Greek yogurt (plain or flavored, depending on preference)
Honey or maple syrup (optional, for sweetness)
Fresh berries (such as strawberries, blueberries, raspberries, or blackberries)
Chopped nuts (optional, and finely chopped for safety)
Granola
Dried fruit (such as raisins or cranberries, chopped into small pieces)
Mini chocolate chips (optional, for a touch of sweetness)
Instructions:
Prepare the Yogurt Base:
In a bowl, mix the Greek yogurt with a little honey or maple syrup if you want to sweeten it naturally. Be mindful of sugar content, especially for very young toddlers.
Spread the Yogurt:
Line a baking sheet with parchment paper.
Pour the yogurt onto the parchment paper and spread it out evenly to about 1/4 inch thick.
Add Toppings:
Sprinkle a variety of toppings over the yogurt. Some toddler-friendly options include:
Fresh berries: cut larger berries into smaller pieces.
Chopped nuts: ensure they are finely chopped to prevent choking.
Granola: adds a nice crunch and fiber.
Dried fruit: chop into small, manageable pieces.
Mini chocolate chips: a few sprinkled for sweetness and fun.
Freeze:
Place the baking sheet in the freezer and let it freeze for at least 2-3 hours or until the yogurt is completely firm.
Serve:
Once frozen, remove the yogurt bark from the freezer.
Break it into toddler-sized pieces. The parchment paper makes it easy to lift and break.
Tips:
Customization: Feel free to customize the toppings based on your toddler’s preferences and dietary restrictions.
Serving Size: Break the bark into small, manageable pieces suitable for toddlers to prevent choking.
Storage: Store the frozen yogurt bark pieces in an airtight container in the freezer. They can be kept for up to 2 weeks.
Defrost Slightly Before Serving: For very young toddlers, allow the pieces to soften slightly at room temperature for a minute or two before serving to make them easier to chew.
Frozen yogurt bark is a fun and nutritious snack that provides a good source of protein and probiotics from the yogurt, along with vitamins and minerals from the fruit and nuts.
It’s a perfect treat for hot days and a great way to make snack time exciting for your little ones.

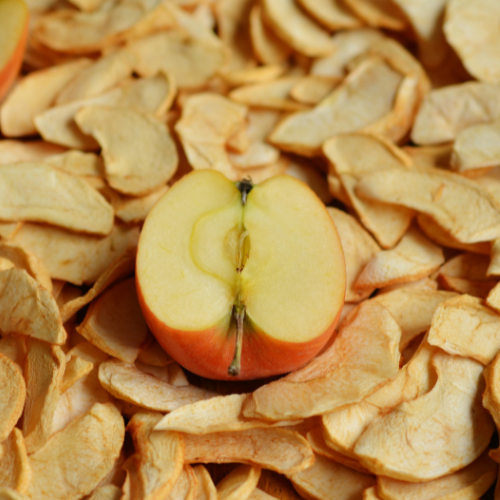
3- Dried Apple Treats
Ingredients:
Apples (Gala, Fuji, Honeycrisp for sweet flavor; Gravenstein, Pink Lady, Cortland, Empire for tart flavor)
Lemon juice (optional, to prevent browning)
Cinnamon (optional, for extra flavor)
Instructions:
Prepare the Apples:
Wash and core the apples.
Slice them into thin rings or wedges, about 1/8 inch thick.
Prevent Browning:
Dip the apple slices in lemon juice if desired.
Season:
Sprinkle with a light dusting of cinnamon if using.
Dry the Apples:
Place the apple slices on a baking sheet lined with parchment paper.
Bake at 200°F (90°C) for 2-3 hours, flipping halfway through, until they are dried and slightly crisp.
Cool and Store:
Let the dried apple slices cool completely.
Store in an airtight container.
Tips:
For a sweet flavor, use Gala, Fuji, or Honeycrisp apples.
For a tart flavor, opt for Gravenstein, Pink Lady, Cortland, or Empire apples.
Ensure slices are evenly thick to dry uniformly.
Check apples periodically to avoid over-drying and ensure they reach your desired level of crispness.
Dried apple treats are a healthy, convenient snack for toddlers, offering natural sweetness and a chewy texture they’ll love.
4- Mini Applesauce Muffins
Ingredients:
1 cup unsweetened applesauce
1/2 cup whole wheat flour
1/2 cup all-purpose flour
1/2 teaspoon baking powder
1/2 teaspoon baking soda
1/2 teaspoon ground cinnamon
1/4 teaspoon ground nutmeg (optional)
1/4 teaspoon salt
1/4 cup honey or maple syrup (optional, for added sweetness)
1 large egg
1/4 cup vegetable oil or melted coconut oil
1 teaspoon vanilla extract
Instructions:
Preheat the Oven:
Preheat your oven to 350°F (175°C).
Grease a mini muffin tin or line with mini muffin liners.
Mix Dry Ingredients:
In a medium bowl, whisk together the whole wheat flour, all-purpose flour, baking powder, baking soda, cinnamon, nutmeg (if using), and salt.
Combine Wet Ingredients:
In a separate large bowl, whisk together the applesauce, honey or maple syrup (if using), egg, oil, and vanilla extract until well combined.
Combine Wet and Dry Ingredients:
Gradually add the dry ingredients to the wet ingredients, stirring until just combined. Be careful not to overmix.
Fill the Muffin Tin:
Spoon the batter into the prepared mini muffin tin, filling each cup about 3/4 full.
Bake:
Bake in the preheated oven for 12-15 minutes, or until a toothpick inserted into the center of a muffin comes out clean.
Cool:
Allow the muffins to cool in the tin for a few minutes before transferring them to a wire rack to cool completely.
Tips:
Storage: Store muffins in an airtight container at room temperature for up to 3 days, or freeze for longer storage.
Add-ins: Customize by adding finely chopped fruits, such as apples or raisins, for added texture and flavor.
Sweetness: Adjust the amount of honey or maple syrup based on your toddler’s preference for sweetness, or omit it entirely for a less sweet muffin.
Mini applesauce muffins are a nutritious and delicious snack for toddlers, perfect for little hands, and full of wholesome ingredients.
These muffins are great for breakfast, snack time, or packed in a lunchbox for a healthy treat on the go.
5- Frozen Applesauce Bites
Ingredients:
- Mott’s® Applesauce Snack and Go Pouches (any flavor)
Instructions:
Prepare the Baking Sheet:
Line a baking sheet with parchment paper or a silicone baking mat.
Create Bites:
Squeeze small dollops of applesauce from the Mott’s® Applesauce Snack and Go Pouches onto the prepared baking sheet. Aim for each dollop to be about 1-2 teaspoons in size, ensuring they are evenly spaced.
Freeze:
Place the baking sheet in the freezer and freeze the applesauce dollops for at least 2-3 hours, or until they are completely frozen.
Store:
Once frozen, transfer the applesauce bites to an airtight container or freezer bag for convenient storage.
Tips:
Portion Size: Make the dollops small enough for toddlers to easily handle and eat.
Flavors: Experiment with different flavors of Mott’s® Applesauce to keep things interesting for your little one.
Serving: Serve the frozen applesauce bites directly from the freezer as a cool, refreshing treat, especially great on a hot day.
Consistency: If the bites are too hard for very young toddlers, let them sit at room temperature for a minute to soften slightly before serving.
Frozen applesauce bites are a quick and healthy snack option for toddlers, offering the delicious taste of applesauce in a fun, frozen form that’s easy to make and enjoy.
6- Avocado Chocolate Chip Cookies
Ingredients:
1 ripe avocado
1/2 cup brown sugar
1/4 cup coconut oil (melted)
1 large egg
1 teaspoon vanilla extract
1 cup whole wheat flour
1/2 teaspoon baking soda
1/2 teaspoon baking powder
1/4 teaspoon salt
1/2 cup mini chocolate chips
Instructions:
Preheat the Oven:
Preheat your oven to 350°F (175°C).
Line a baking sheet with parchment paper.
Prepare the Wet Ingredients:
In a large bowl, mash the avocado until smooth.
Add the brown sugar and melted coconut oil, and mix until well combined.
Stir in the egg and vanilla extract until the mixture is smooth.
Combine Dry Ingredients:
In a separate bowl, whisk together the whole wheat flour, baking soda, baking powder, and salt.
Mix Wet and Dry Ingredients:
Gradually add the dry ingredients to the wet mixture, stirring until just combined.
Fold in the mini chocolate chips.
Form Cookies:
Scoop tablespoon-sized portions of dough onto the prepared baking sheet, flattening them slightly with the back of a spoon.
Bake:
Bake in the preheated oven for 10-12 minutes, or until the edges are lightly golden.
Allow the cookies to cool on the baking sheet for a few minutes before transferring them to a wire rack to cool completely.
Tips:
Ripeness: Make sure the avocado is ripe for easier mashing and a smoother texture.
Sweetness: Adjust the amount of sugar based on your toddler’s preference. You can also use a natural sweetener like honey or maple syrup if preferred.
Add-ins: For added nutrition, consider mixing in some finely chopped nuts or seeds.
Storage: Store the cookies in an airtight container at room temperature for up to 3 days, or freeze for longer storage.
Avocado chocolate chip cookies are a unique and healthy twist on a classic treat, providing the creamy benefits of avocado with the deliciousness of chocolate chips.
These cookies are perfect for toddlers, offering a nutritious snack that’s both fun and tasty.
7- Frozen Banana Pops
Ingredients:
4 ripe bananas
1 cup semi-sweet chocolate chips or dark chocolate chips
2 tablespoons coconut oil
Toppings (optional): chopped nuts, sprinkles, shredded coconut, or crushed graham crackers
Popsicle sticks or wooden skewers
Instructions:
Prepare the Bananas:
Peel the bananas and cut them in half crosswise.
Insert a popsicle stick or wooden skewer into the flat end of each banana half.
Freeze the Bananas:
Place the banana halves on a baking sheet lined with parchment paper.
Freeze the bananas for at least 2 hours, or until they are completely frozen.
Prepare the Chocolate Coating:
In a microwave-safe bowl, combine the chocolate chips and coconut oil.
Microwave in 30-second intervals, stirring between each, until the chocolate is fully melted and smooth.
Alternatively, melt the chocolate and coconut oil in a double boiler over simmering water, stirring until smooth.
Dip the Frozen Bananas:
Remove the frozen bananas from the freezer.
Dip each banana pop into the melted chocolate, using a spoon to help cover it evenly.
Quickly add your choice of toppings before the chocolate hardens.
Freeze Again:
Place the chocolate-dipped banana pops back on the parchment-lined baking sheet.
Return them to the freezer for another 30 minutes, or until the chocolate is set.
Serve:
Once the chocolate is hardened, the frozen banana pops are ready to eat. Store any leftovers in an airtight container in the freezer.
Tips:
Ripe Bananas: Use ripe but firm bananas to ensure they hold up well when frozen and dipped.
Customization: Experiment with different toppings to find your toddler’s favorites. You can even mix toppings for added fun and texture.
Chocolate Type: Choose semi-sweet or dark chocolate for a richer flavor. You can also use milk chocolate if preferred.
Drizzle: For a fun twist, drizzle some white chocolate over the dark chocolate coating once it has set for a decorative effect.
Frozen banana pops with a chocolate-dipped covering are a delicious and healthy treat for toddlers.
They are easy to make and provide a refreshing and satisfying snack that’s perfect for hot days or any time your little one wants something sweet and cool.
8- Frozen Yogurt Banana Dippers
Ingredients:
3 ripe bananas
1 cup Greek yogurt (plain or flavored)
1 teaspoon honey or maple syrup (optional, for added sweetness)
Toppings (optional): granola, chopped nuts, sprinkles, shredded coconut, mini chocolate chips, or crushed graham crackers
Popsicle sticks or wooden skewers
Instructions:
Prepare the Bananas:
Peel the bananas and cut them into thick slices, about 1-2 inches each.
Insert a popsicle stick or wooden skewer into each banana slice.
Prepare the Yogurt:
In a bowl, mix the Greek yogurt with honey or maple syrup if you want to add a bit of sweetness.
If using flavored yogurt, you can skip the sweetener or add it based on taste preference.
Dip the Bananas:
Dip each banana slice into the yogurt, using a spoon to help cover it completely and evenly.
Allow any excess yogurt to drip off.
Add Toppings:
Immediately sprinkle or roll the yogurt-covered banana slices in your choice of toppings. Make sure to press the toppings gently to ensure they stick well.
Freeze:
Place the yogurt-covered banana dippers on a baking sheet lined with parchment paper.
Freeze the dippers for at least 2 hours, or until the yogurt is fully set and the bananas are frozen.
Serve:
Once frozen, the banana dippers are ready to enjoy. Store any leftovers in an airtight container in the freezer.
Tips:
Ripe Bananas: Use ripe but firm bananas to ensure they hold up well during the dipping and freezing process.
Flavor Variety: Try using different flavors of Greek yogurt to keep things interesting for your toddler.
Topping Combinations: Mix and match toppings for added fun and texture. You can create different combinations to find out which ones your toddler loves the most.
Storage: Store the frozen banana dippers in an airtight container or freezer bag to prevent them from absorbing any freezer odors.
Frozen yogurt banana dippers are a healthy, refreshing, and fun snack for toddlers.
They provide a good source of protein from the yogurt and potassium from the bananas, making them a nutritious treat that’s perfect for any time of day.
9- Banana Toast for Toddlers
Ingredients:
1 ripe banana
1 slice whole wheat bread (or bread of your choice)
Optional toppings: a sprinkle of cinnamon, a drizzle of honey, a spread of nut butter (if no nut allergies), or a dollop of Greek yogurt
Instructions:
Prepare the Banana:
Peel the ripe banana and mash it in a bowl until smooth.
Toast the Bread:
Toast the slice of whole wheat bread until it reaches your desired level of crispness.
Spread the Banana:
Spread the mashed banana evenly over the toasted bread, covering the entire surface.
Add Optional Toppings:
Sprinkle a pinch of cinnamon over the banana layer for added flavor.
Drizzle a small amount of honey over the banana for natural sweetness (if desired).
For added protein and flavor, spread a thin layer of nut butter over the banana (ensure no nut allergies).
For a creamy texture and added protein, add a dollop of Greek yogurt on top of the banana.
Cut and Serve:
Cut the banana toast into small, manageable pieces suitable for your baby’s age and ability to chew.
Serve immediately as a nutritious and delicious snack or meal option for your baby.
Tips:
Texture: If your baby is just starting on solid foods, ensure the mashed banana is smooth and spread thinly on the toast to prevent choking hazards.
Variations: Experiment with different bread types and toppings to find combinations that your baby enjoys.
Allergies: Be mindful of potential allergens when introducing new foods to your baby/toddler. Avoid nut butter if there are allergies, and always consult with a pediatrician if you have any concerns.
Mash: If your baby is not yet ready for textures, you can mash the banana thoroughly and spread it thinly on the toast for easier consumption.
Banana toast is a nutritious and easy-to-make snack or meal option for babies, providing essential nutrients like potassium, fiber, and carbohydrates.
It’s a versatile dish that can be customized to suit your baby’s tastes and dietary needs.
10- Raspberry Honey Bowls
Ingredients:
1 cup fresh raspberries
1 tablespoon honey
1/2 cup Greek yogurt (optional)
2 tablespoons granola
Fresh mint leaves for garnish (optional)
Instructions:
Prepare the Raspberry Honey Sauce:
In a small bowl, mash the fresh raspberries with a fork until they reach a chunky consistency.
Stir in the honey until well combined. Adjust the amount of honey based on your desired level of sweetness.
Assemble the Bowls:
If using Greek yogurt, spoon a portion into the bottom of each serving bowl to create a base layer.
Top the Greek yogurt (or directly into the serving bowls if not using yogurt) with the raspberry honey sauce.
Add Toppings:
Sprinkle granola evenly over the raspberry honey sauce.
Optionally, garnish with fresh mint leaves for a burst of color and flavor.
Serve:
Serve the raspberry honey bowls immediately as a delicious and refreshing snack or dessert option.
Tips:
Variations: Feel free to customize your raspberry honey bowls with additional toppings such as sliced almonds, shredded coconut, chia seeds, or other fresh berries.
Substitutions: If raspberries are not available, you can use other berries such as strawberries, blueberries, or blackberries.
Texture: Adjust the texture of the raspberry honey sauce by mashing the raspberries more or less depending on your preference.
Sweetness: You can adjust the sweetness of the raspberry honey sauce by adding more or less honey according to your taste.
Raspberry honey bowls are a delightful and nutritious treat that can be enjoyed as a snack, breakfast, or dessert.
They are bursting with the flavors of fresh raspberries and sweet honey, balanced with creamy Greek yogurt and crunchy granola.
It’s a simple yet satisfying dish that’s perfect for any time of day.
In Conclusion
Making healthy snacks for toddlers is not only important for their physical development but also for instilling good eating habits early on.
By offering a variety of nutritious options, we can help support their growth and development while encouraging a love for wholesome foods.
From simple fruit and yogurt combinations to creative frozen treats and homemade baked goods, there are endless possibilities for creating snacks that are both delicious and nourishing.
By involving toddlers in the preparation process and being mindful of their preferences and dietary needs, we can make snack time an enjoyable and educational experience.
With a little creativity and planning, we can ensure that our little ones have access to snacks that not only satisfy their hunger but also contribute to their overall health and well-being.
Pin for later reading